Accessing objects stored in S3
Creating IAM Role for your EC2 Instance
Our EC2 instance we created at the beginning of the lab is a web server that has already been setup to view our objects, we will need to provide it three things:
- Permission to access to our new S3 bucket: Since our S3 bucket is private, we will do this by creating a role with the Identity and Access Management (IAM) service. You can find more information about IAM Roles here.
- The name of our bucket.
- The region hosting our bucket.
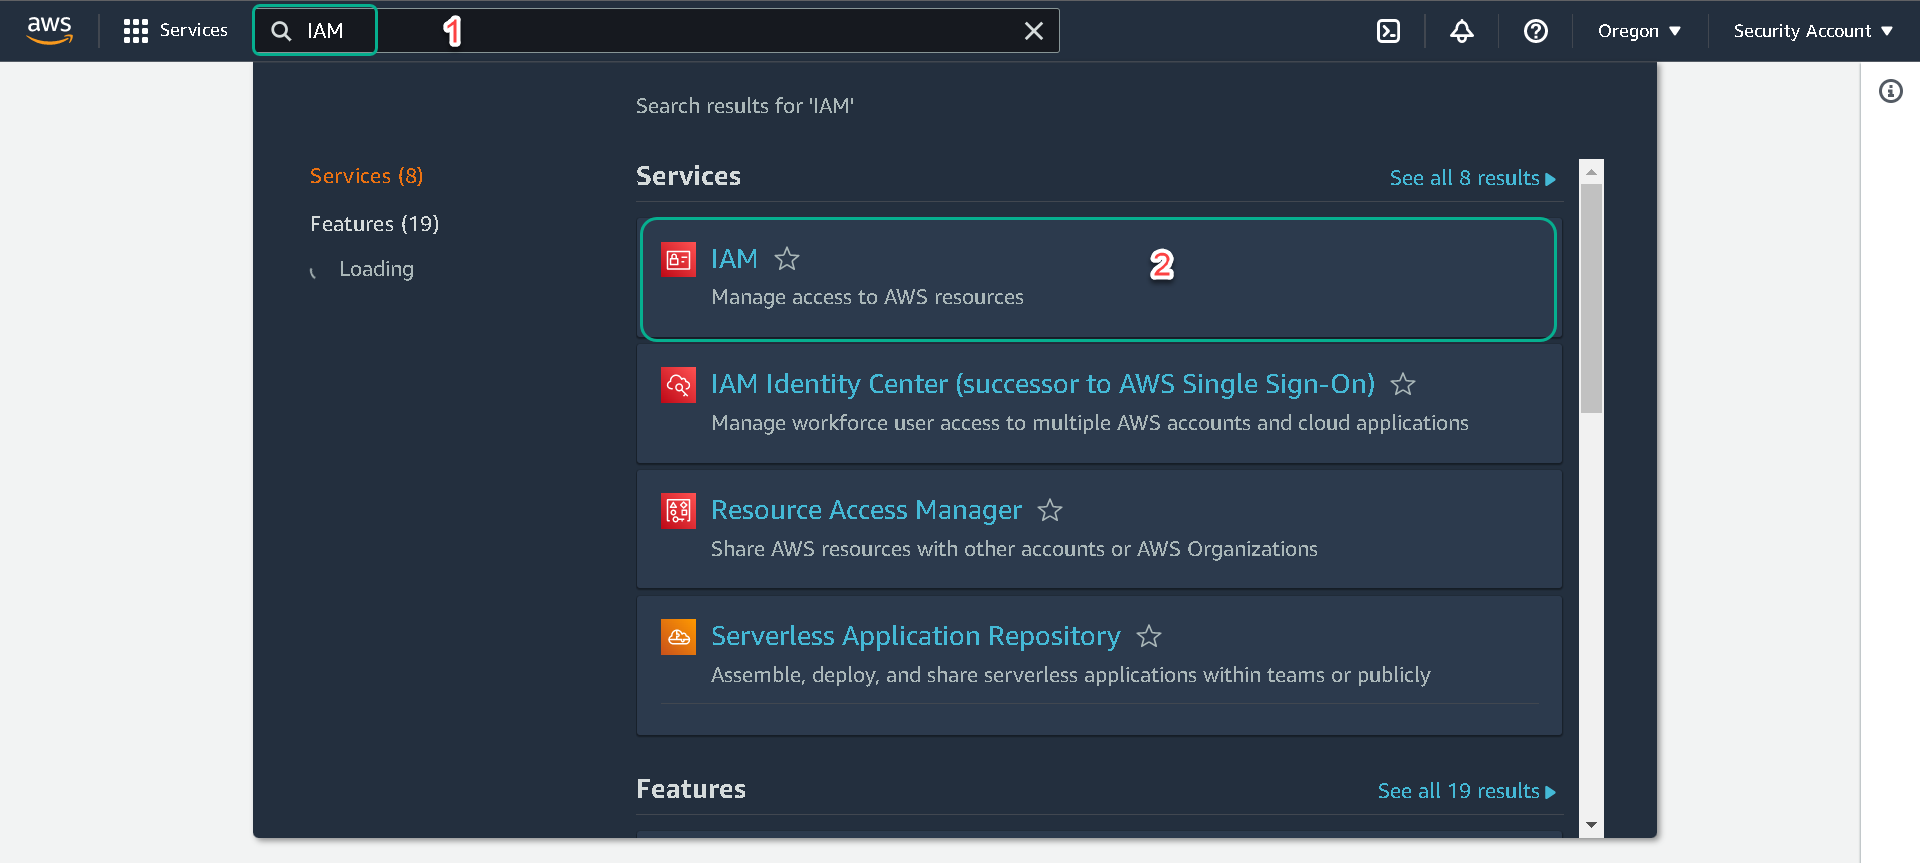
1.Within the AWS console search for “IAM” under “Services” or follow this link.
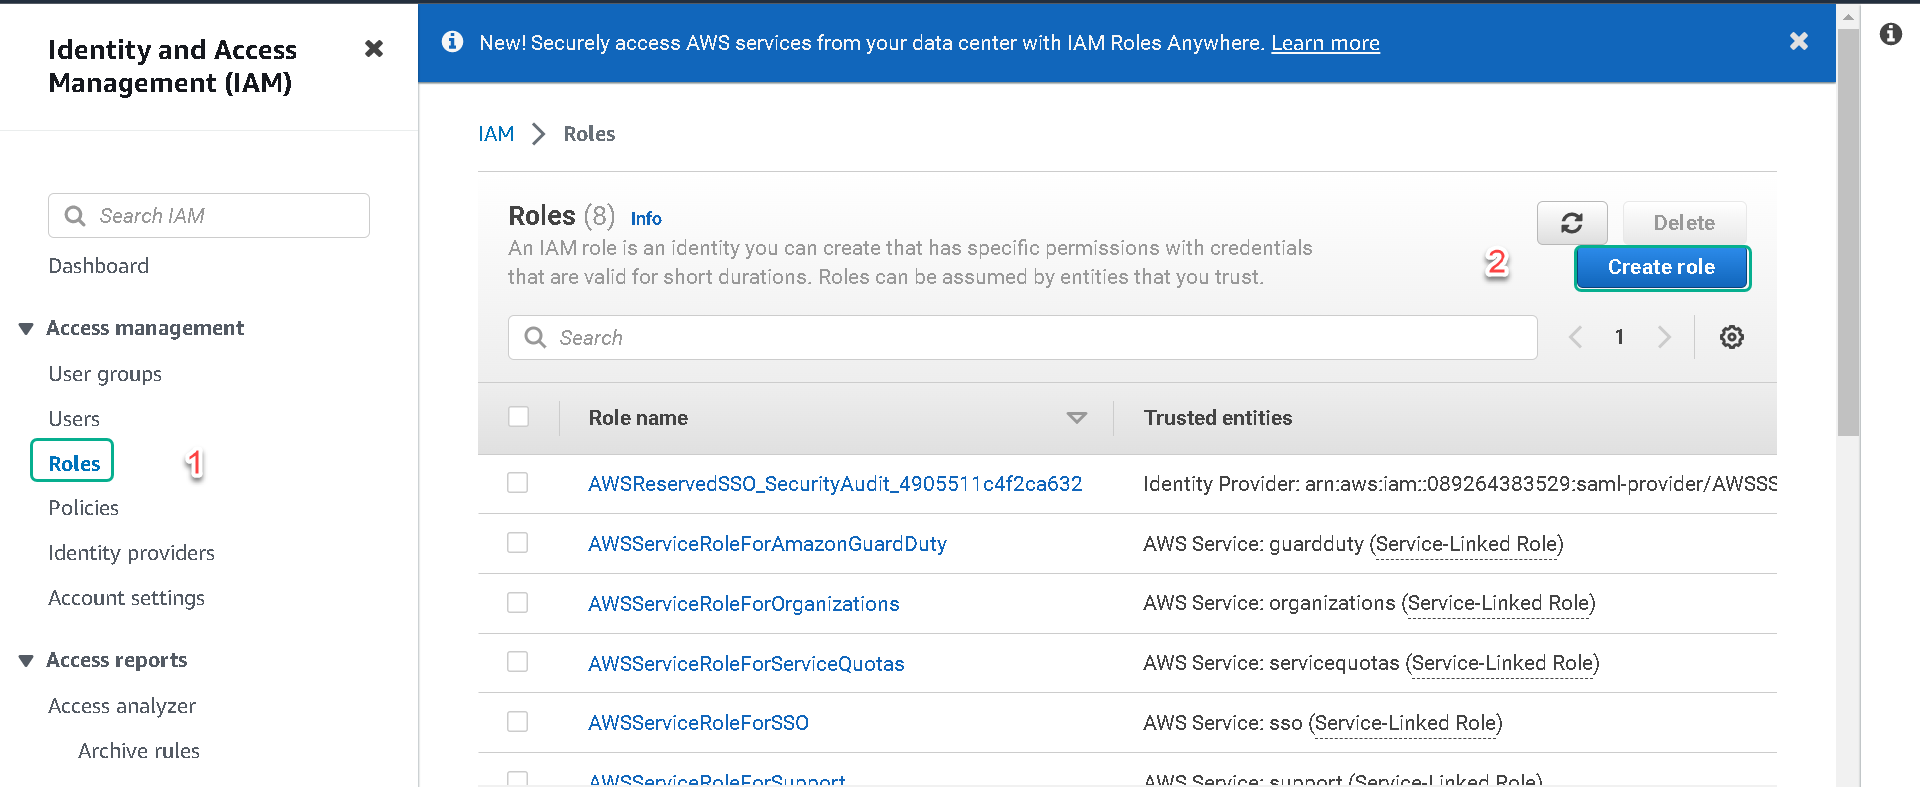
2.From the left-hand menu select Roles.
3.Click on the Create role button.
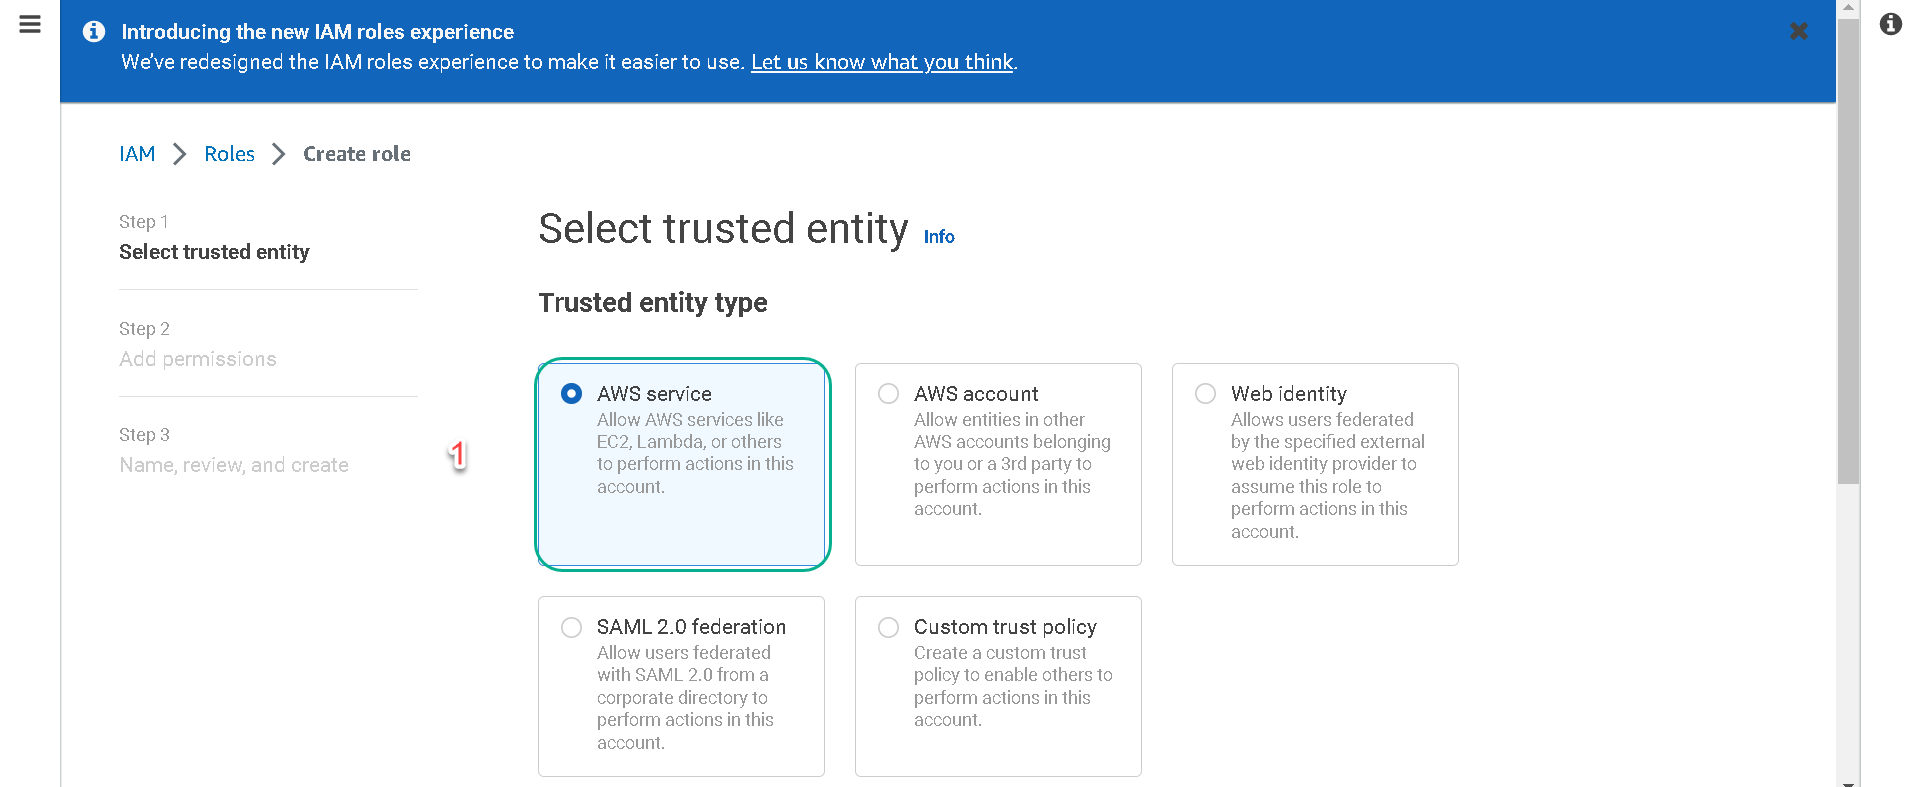
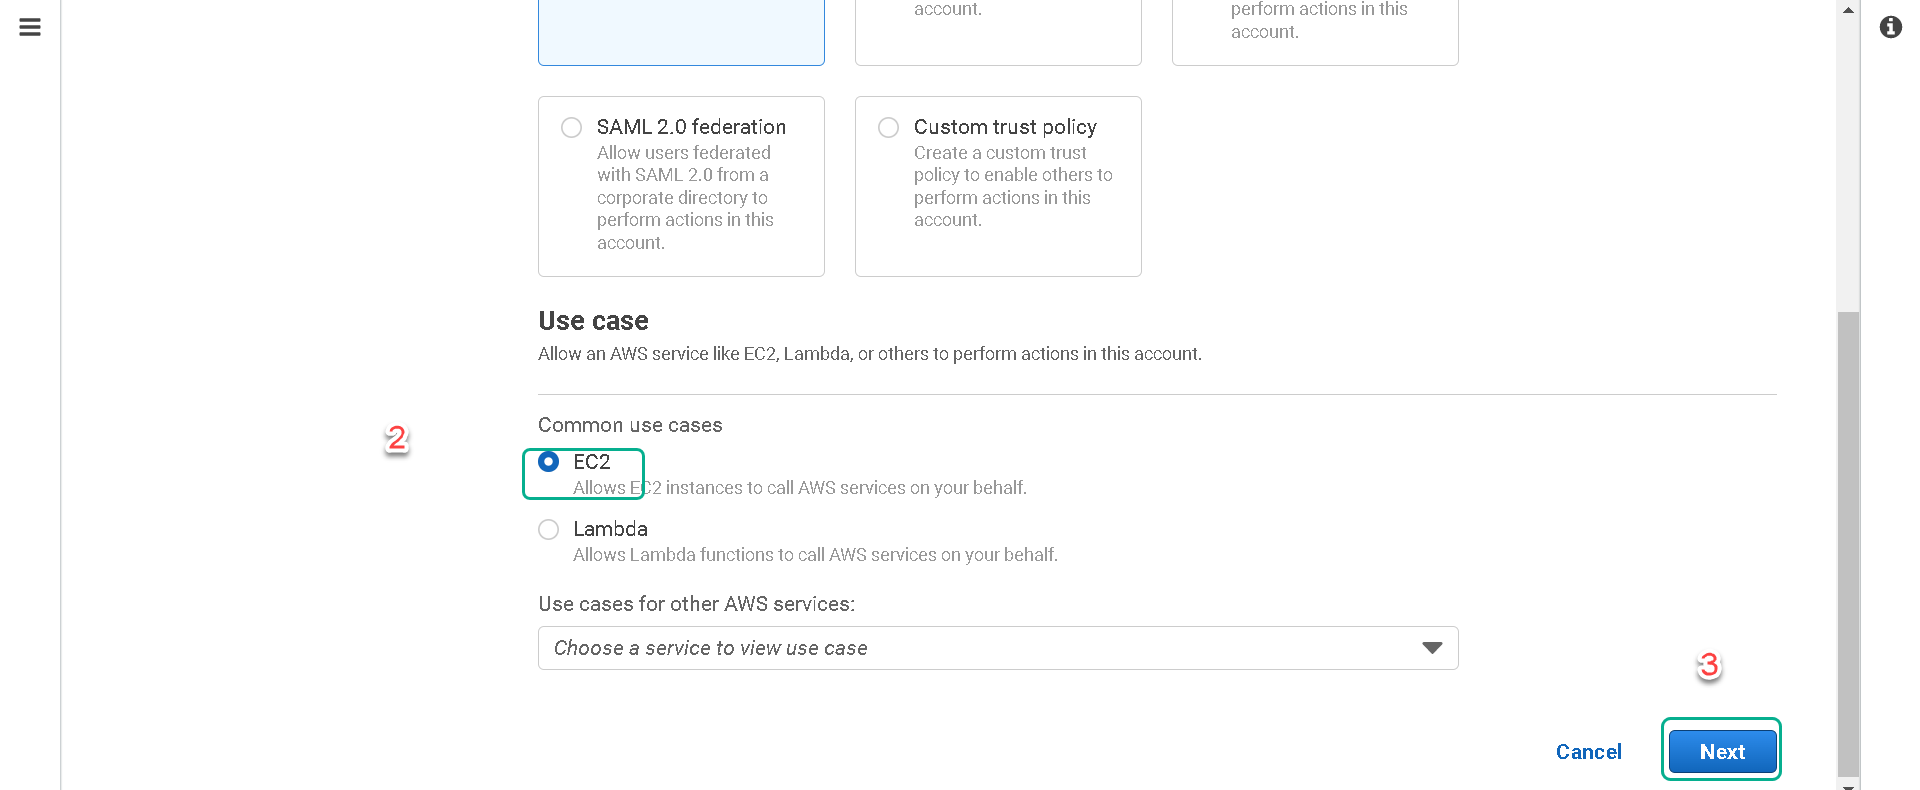
4.Under “Trusted entity type” make sure AWS service is selected and then under “Use case” select EC2. Then click on the Next button.
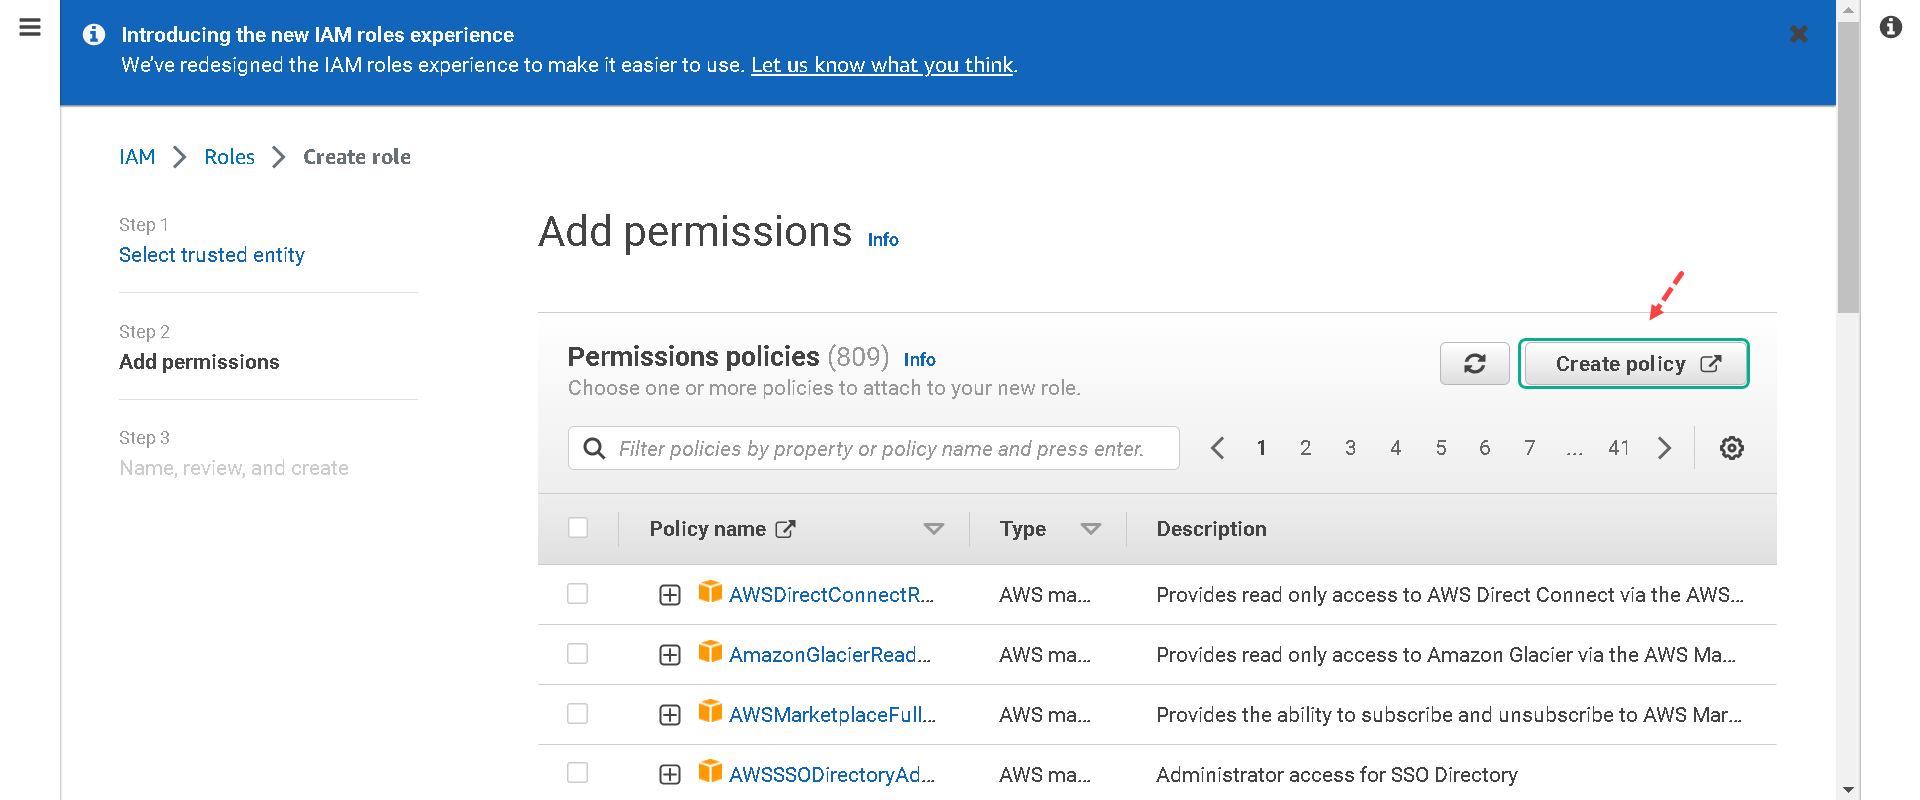
5.Next, we will create a permission policy for our role. A permission policy defines what actions the role can take and what resources the role can use. Click on Create Policy. (This will open another tab in your browser)
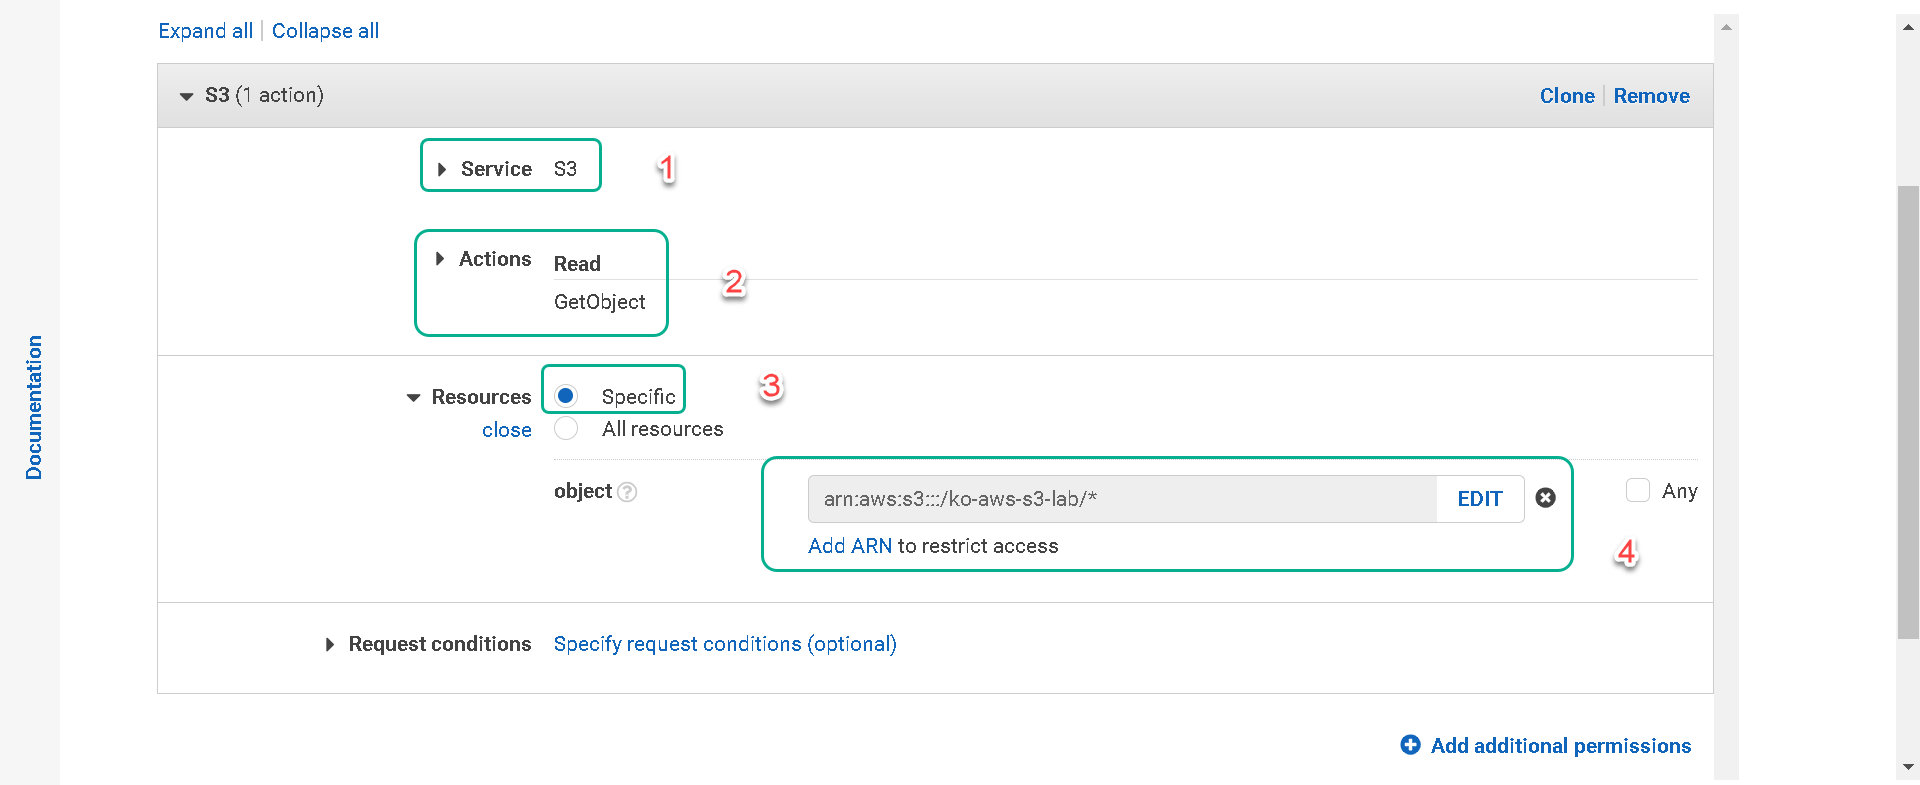
6.On the “Create Policy” page under the “Visual editor” tab: a. Under “Service” select the Choose a service link. Type S3 in the search field and then select S3.
b. Under “Actions” type GetObject in the “Filter actions” search. Put a check in the box next to “GetObject” only. GetObject will restrict our EC2 instance to only being able to read objects within the bucket you select in the next step.
c. Next to “Resources” click on Specify object resource ARN for the GetObject action. Make sure Specify is selected and then click on Add ARN. (ARN stands for “Amazon Resource Name”)
d. In the dialogue that opens type in or paste [your-bucket-name] in the “Bucket name *” field.
e. For the “Object name *” field select the check box next to “Any” and then click on Add.
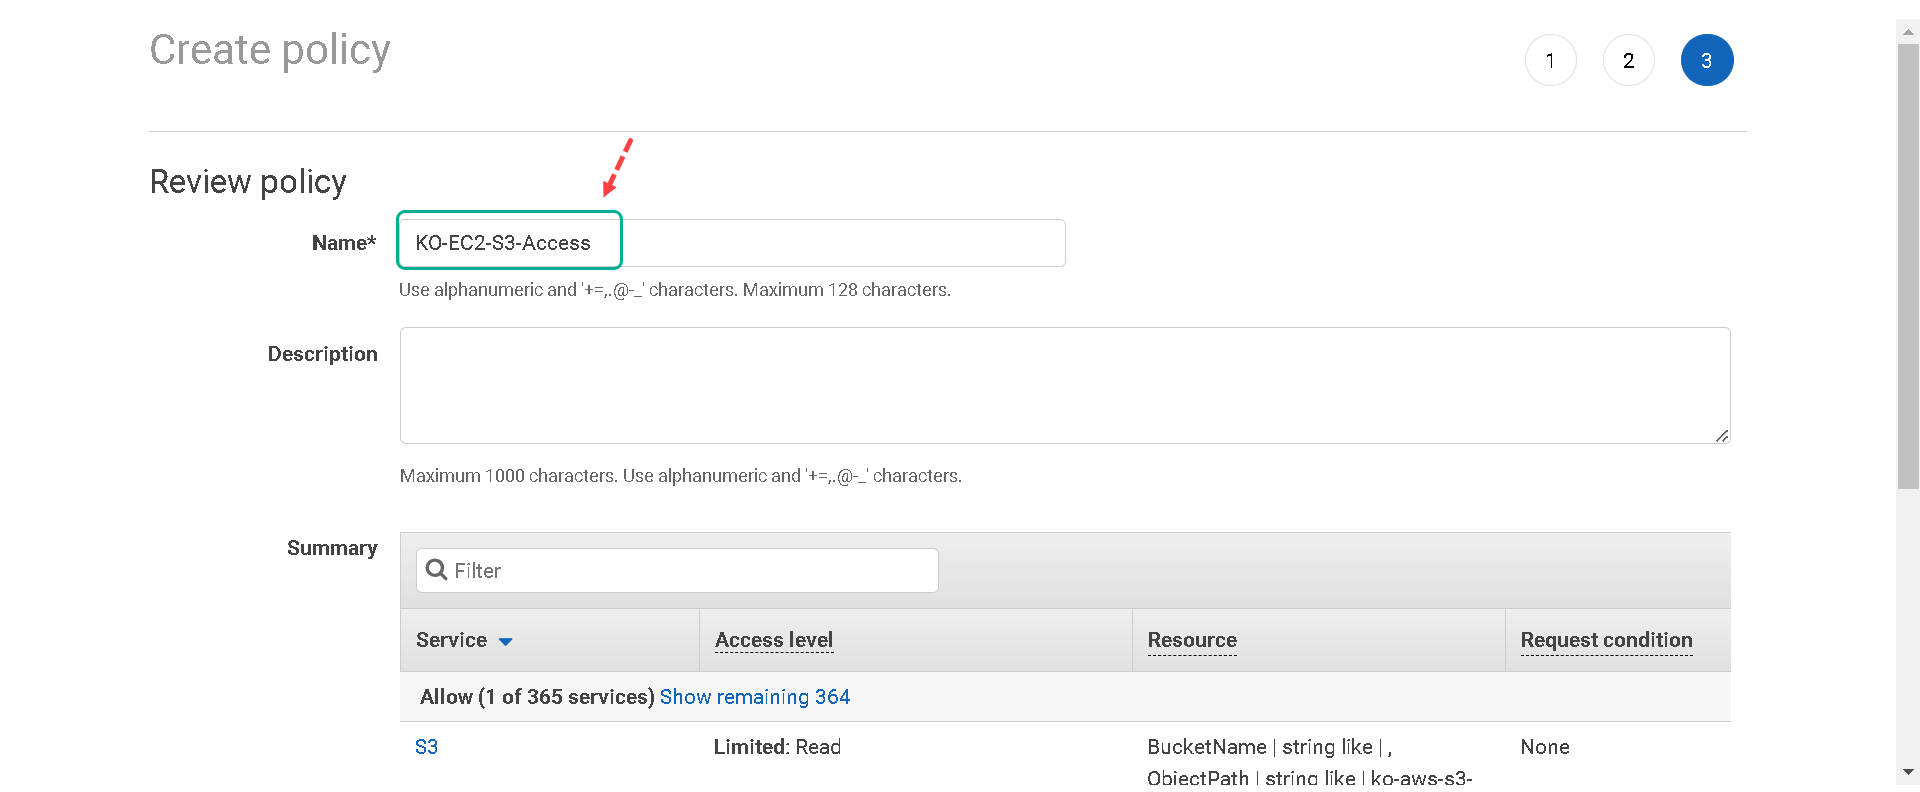
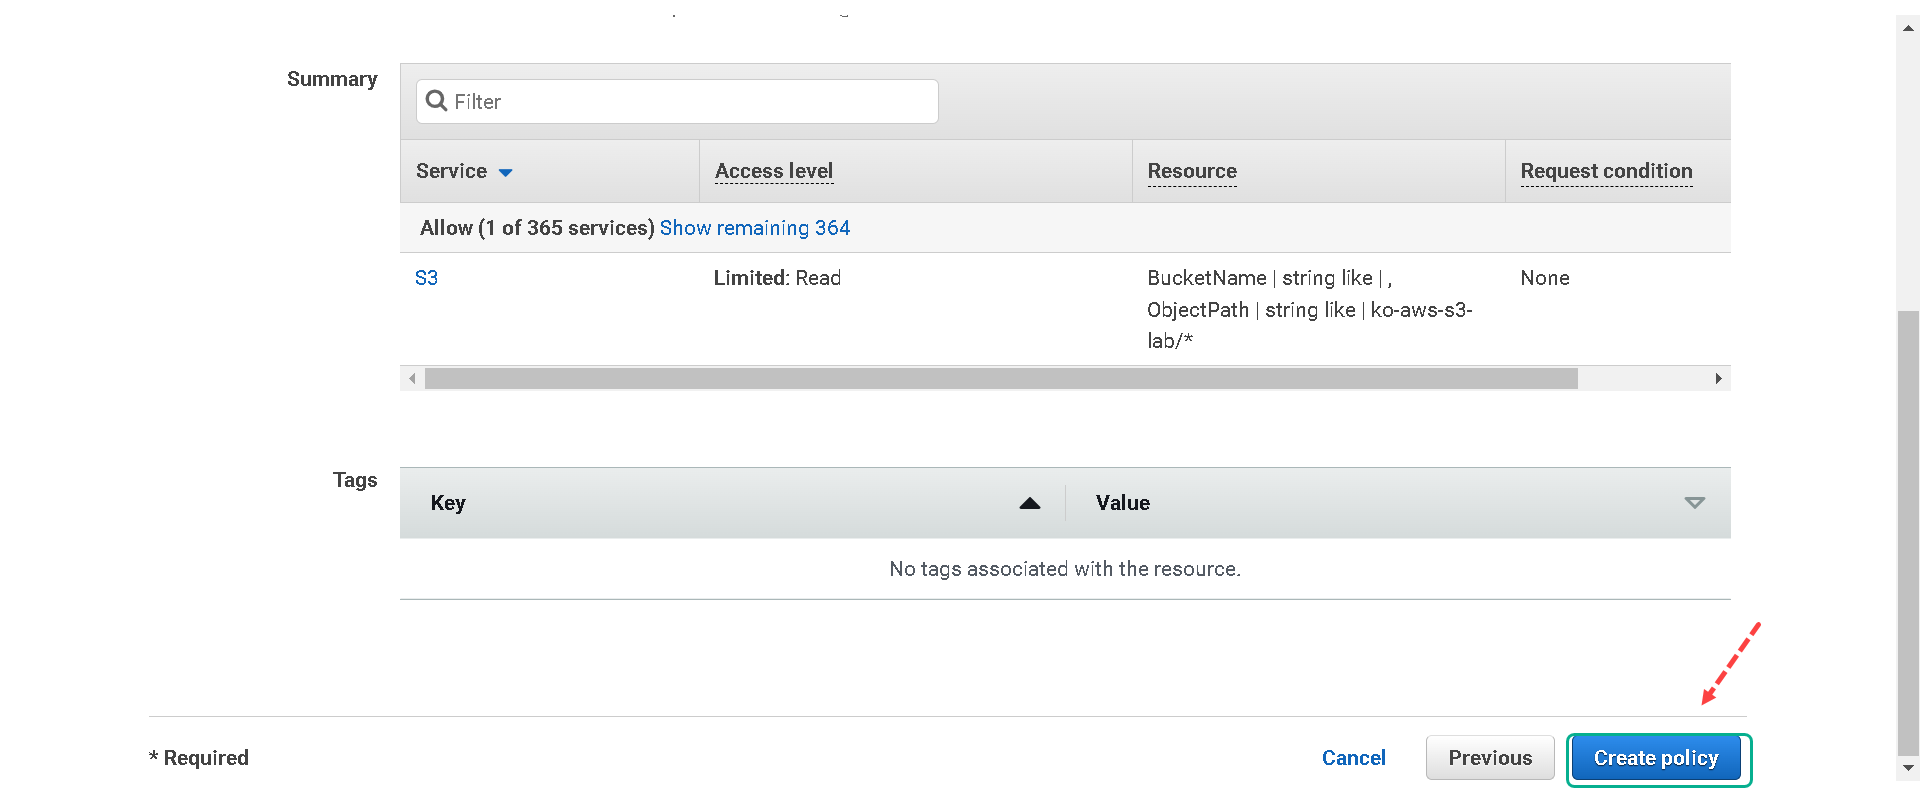
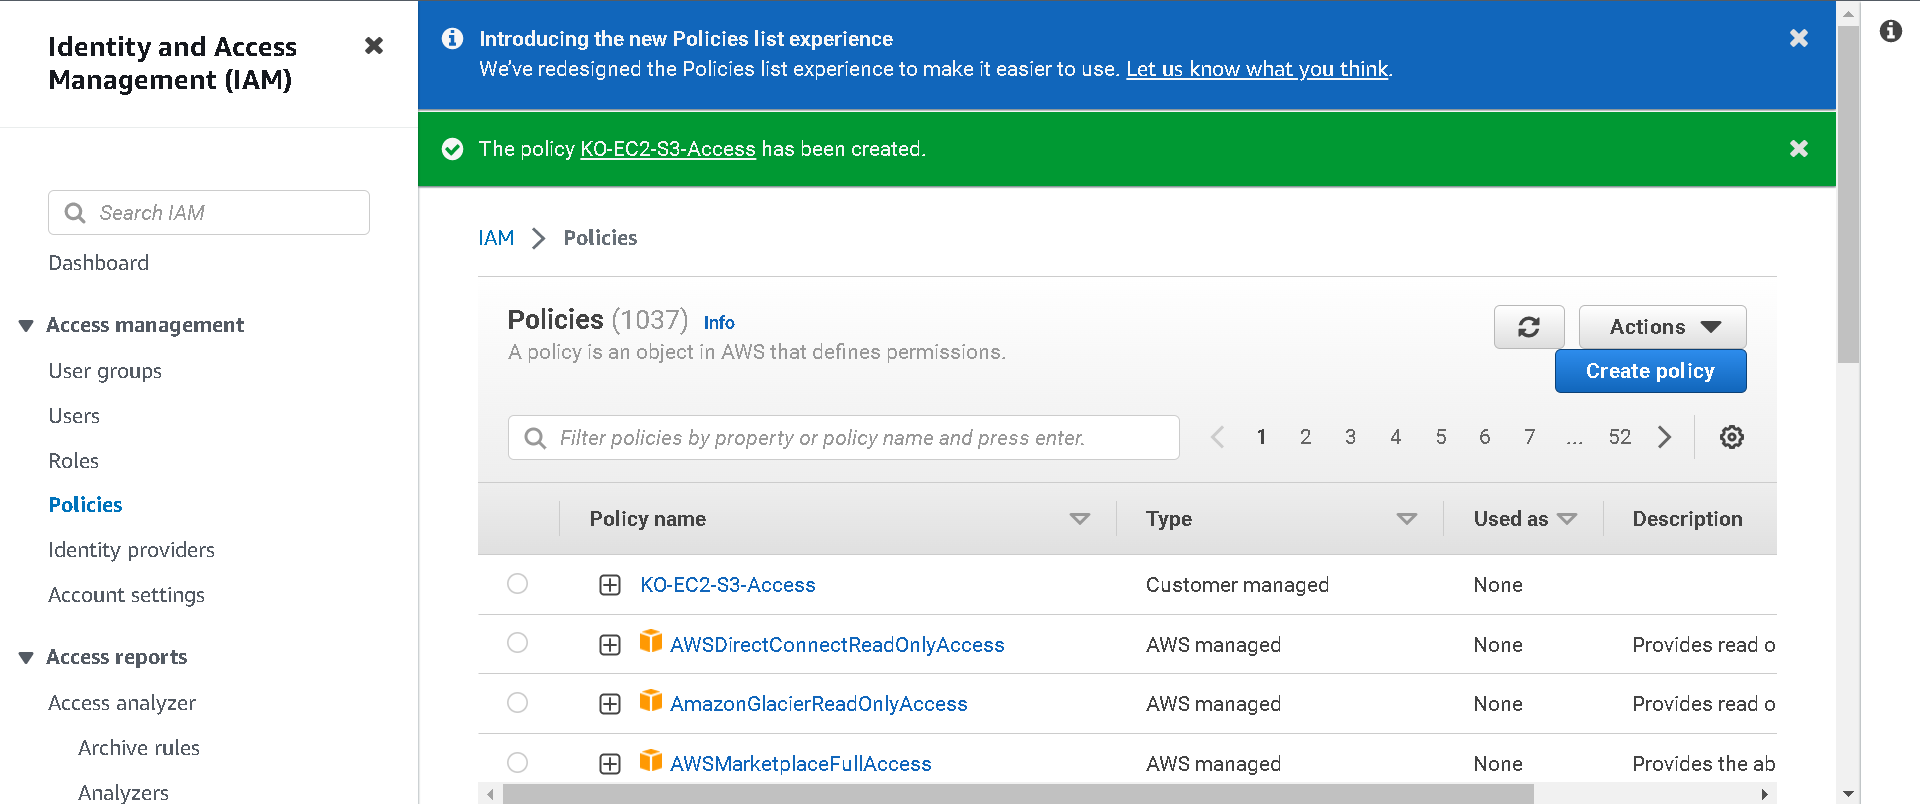
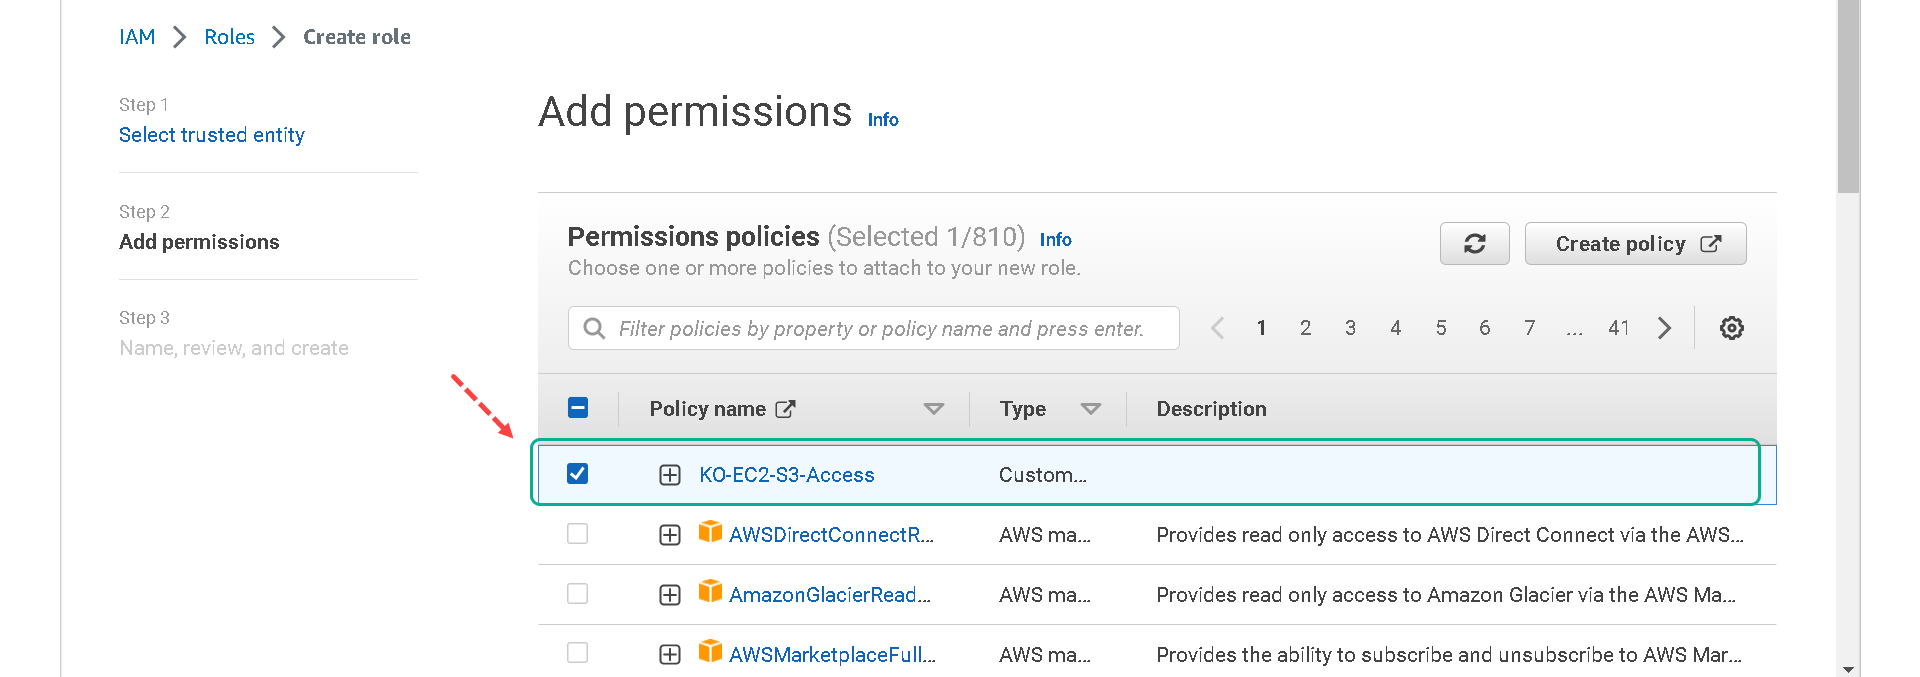
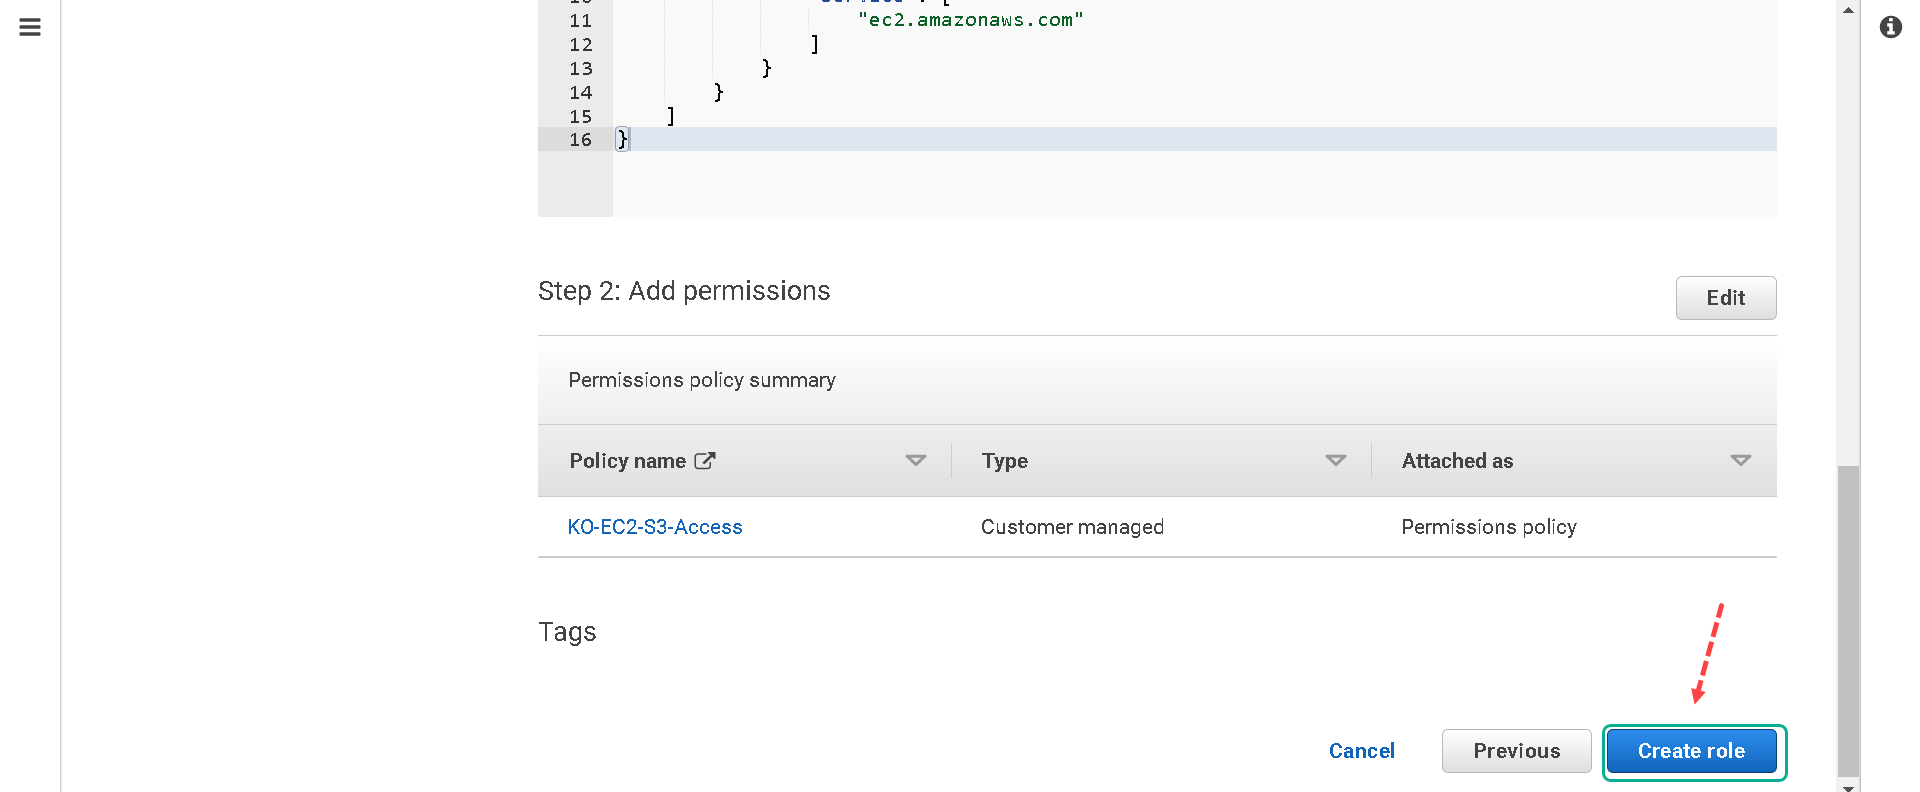
7.Now return to your previous browser tab to finish creating your role. Click the refresh button on the right to load your newly created policy. In the “Filter policies” field search for S3. Select the policy you created in the previous steps, [your initials]-EC2-S3-Access, and then select Next.
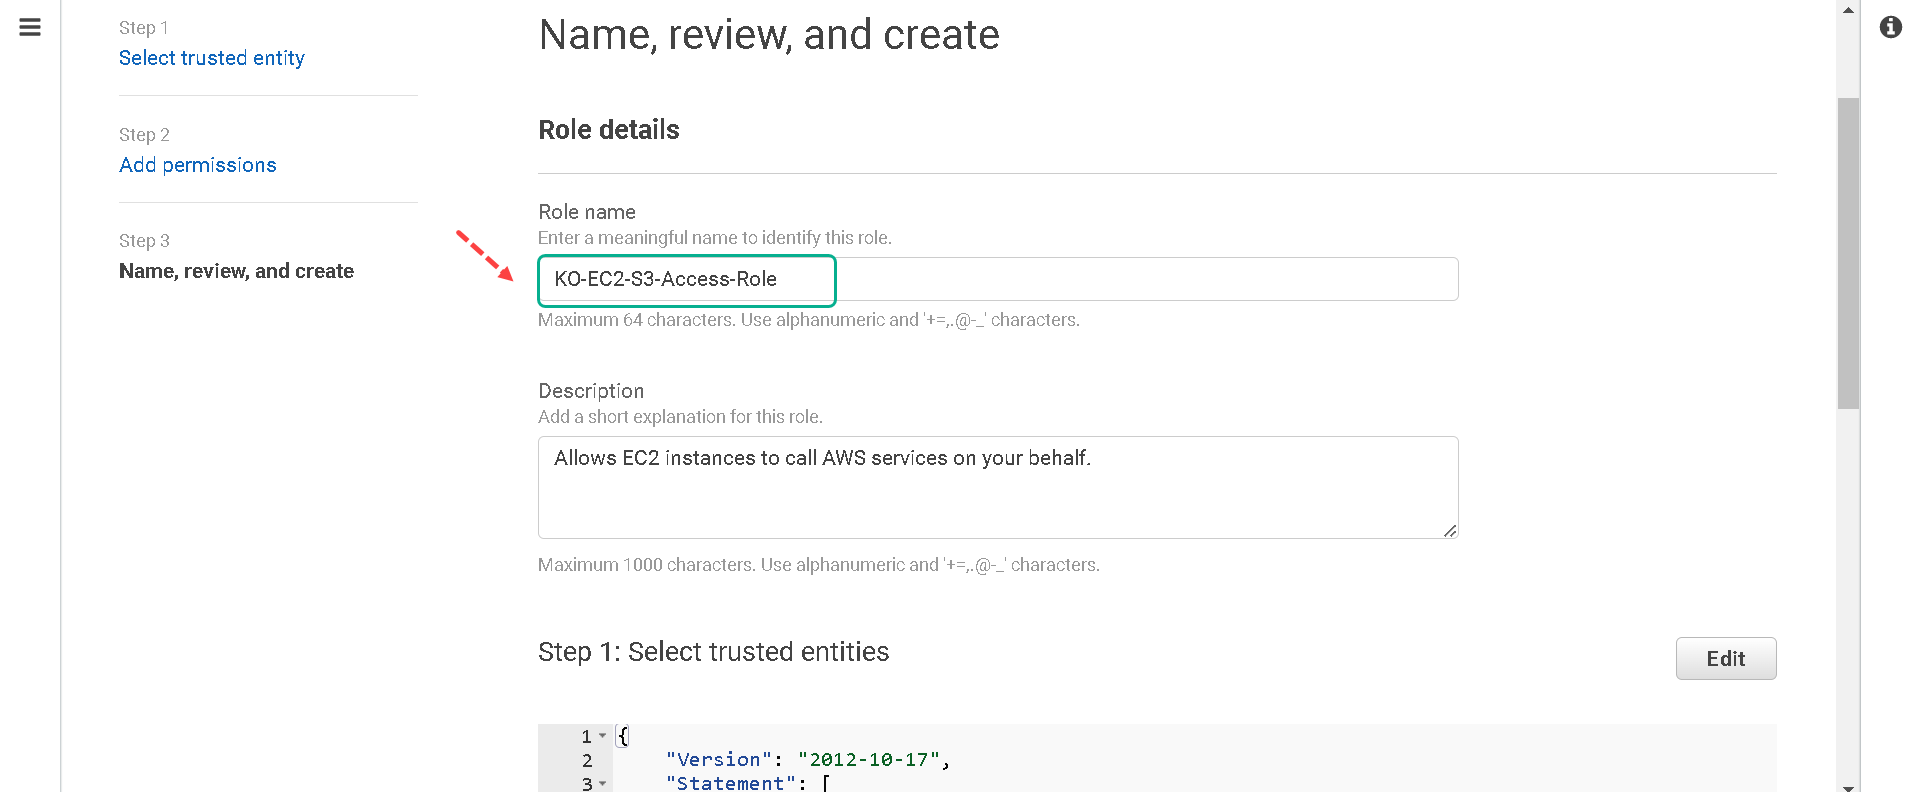
8.We will not be tagging this role so you can click on Next: Review. 9.Name your role [your initials]-EC2-S3-Access-Role and click on Create role.
Attach your new role to your EC2 instance
You have successfully created a role that will give your EC2 web host access to read objects within your S3 bucket. You will need to attach it to your EC2 instance.
1.Under “Services” select EC2.
2.Click on Instances in the left-hand menu.
3.Find your instance that you named “[your initials] - Web Server”.
4.Right-click on your instance, select Security and then Modify IAM Role. This can also be accomplished by selecting your instance and selecting the Actions button.
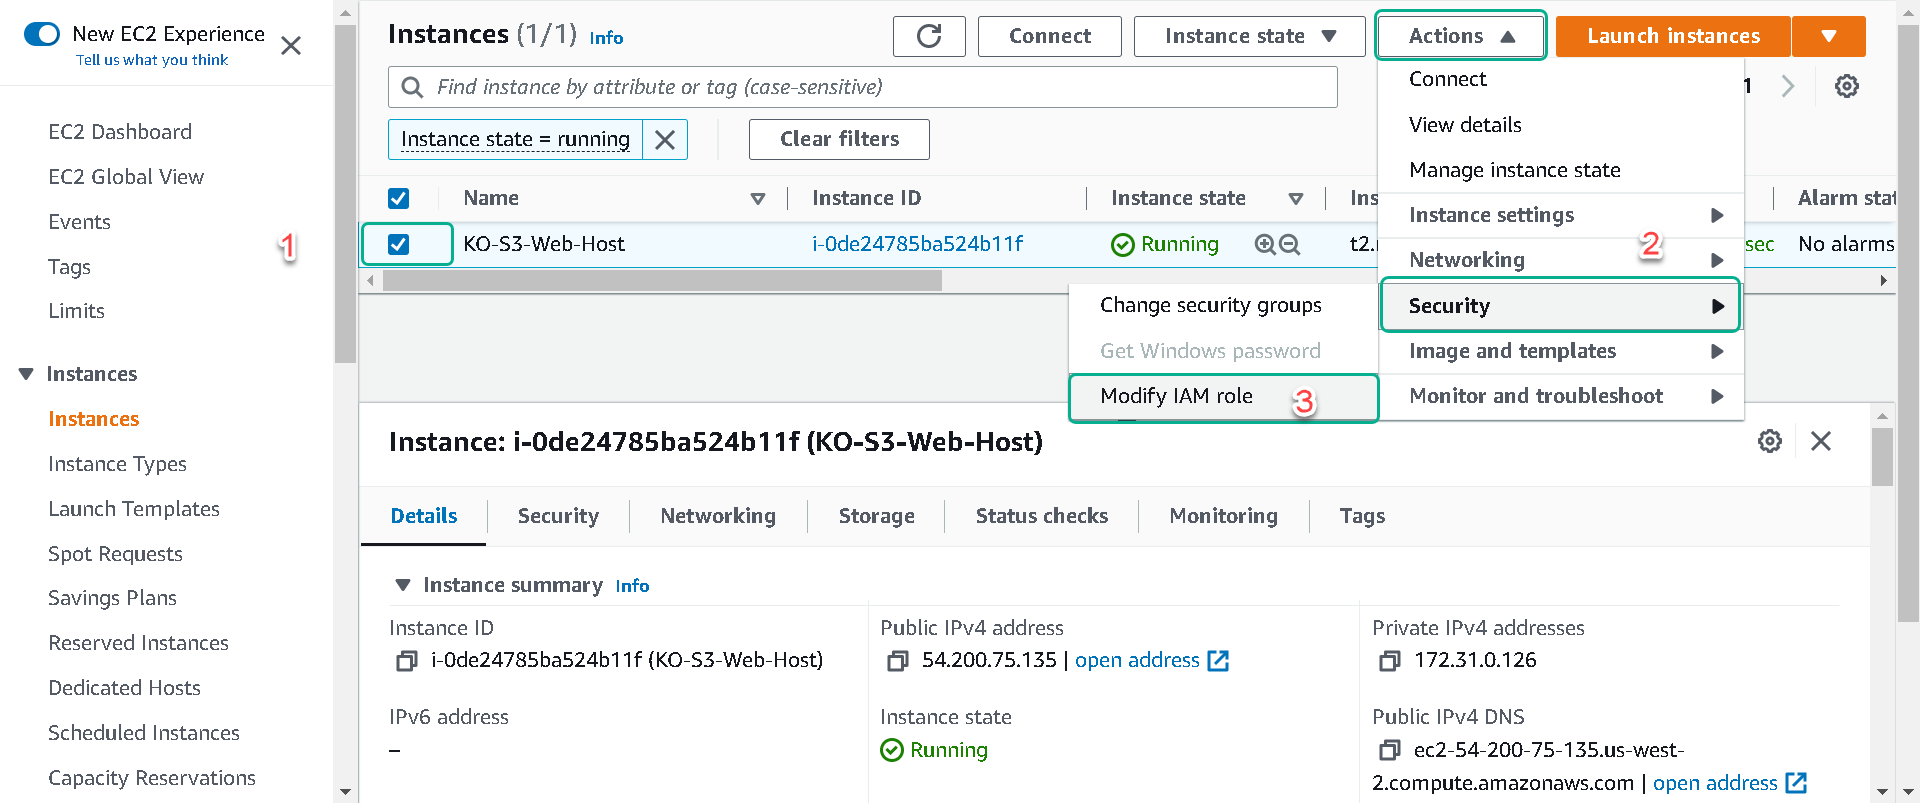
5.From the “IAM role” dropdown select your role you named [your initials]-EC2-S3-Access-Role and click on Save.

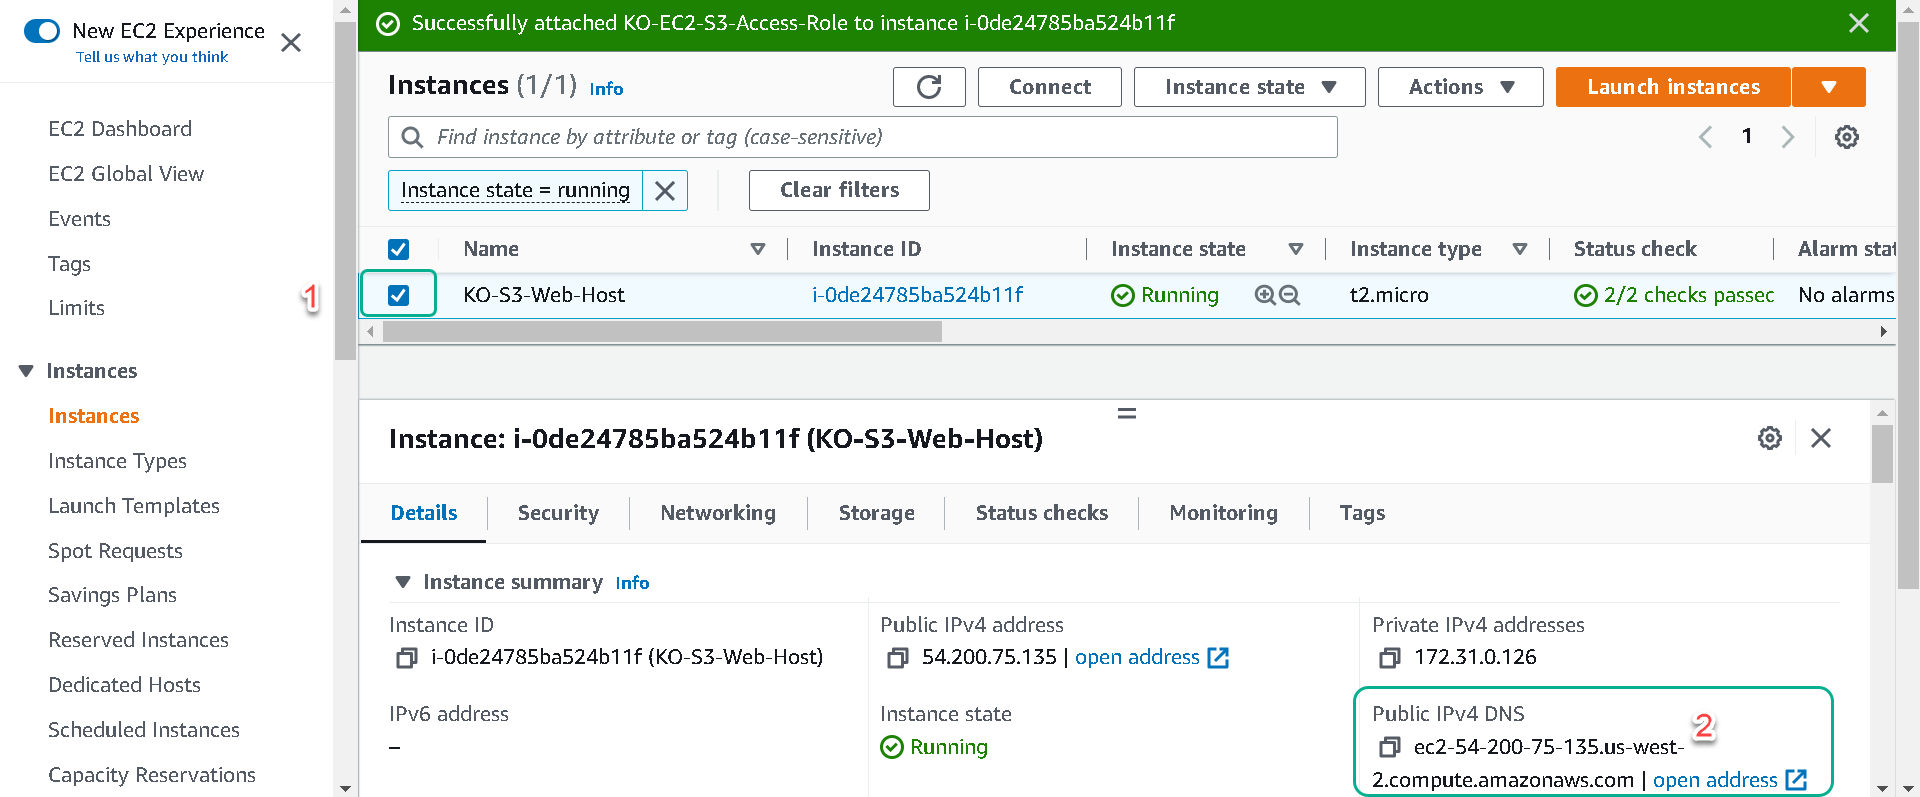
6.Your instance now has read access to your private S3 bucket.
View your Objects in a Web Browser
Navigate to the EC2 “Instances” page, select your instance “[Your Initials]-S3-Web-Host” and copy the “Public IPv4 DNS” address into your clipboard by clicking on the image of two overlapping squares to the left of the Public IPv4 DNS Address. Paste this address into a new tab on your web browser.
Clicking on the open address link under “Public IPv4 DNS” heading may result in you not being able to see your website. The “open address” link uses https:// instead of http://, which will result with an error because our website server has not been setup with an SSL cert.
1.You should now see the “S3 Hands-On Lab” page where you can input your bucket information.
2.If you need to look up your bucket name and region that can be found on the S3 Service page. The region should be entered into the form in this format: e.g. us-west-2
3.Enter your “Bucket Name” and “AWS Region” and click Submit. After you click on submit you should then see the images you uploaded earlier in a small gallery. (The image with the red X is intentional, we will update this image in the versioning section of the lab)
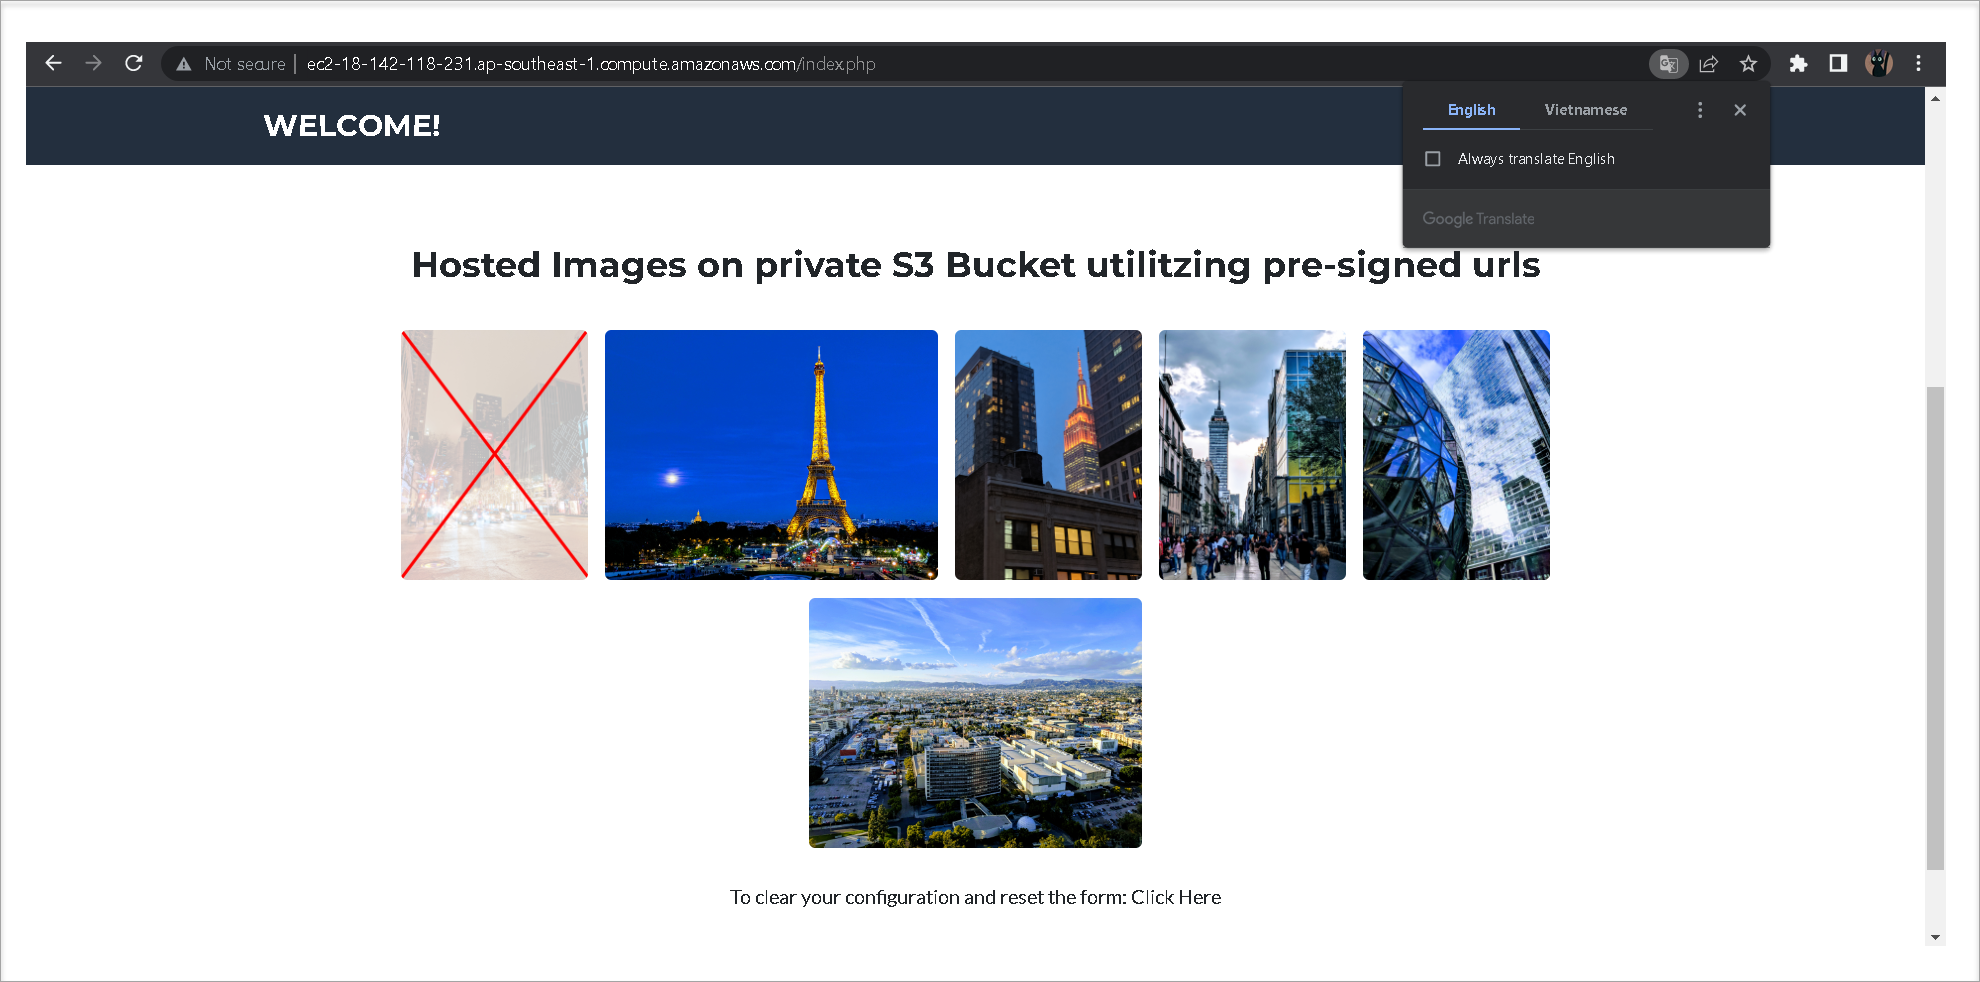
If you are interested in what is happening behind the scenes: The images are read by your web browser from your private S3 bucket. This is done by creating a presigned URL for each object. (in this case the objects are the images) An object owner can share objects with others by creating a presigned URL, using their own security credentials, to grant time-limited permission to those objects. In this case the security credentials we passed to S3 is the role we created for our EC2 instance. If you directly open one of the images in your browser you will see the very long presigned URL.
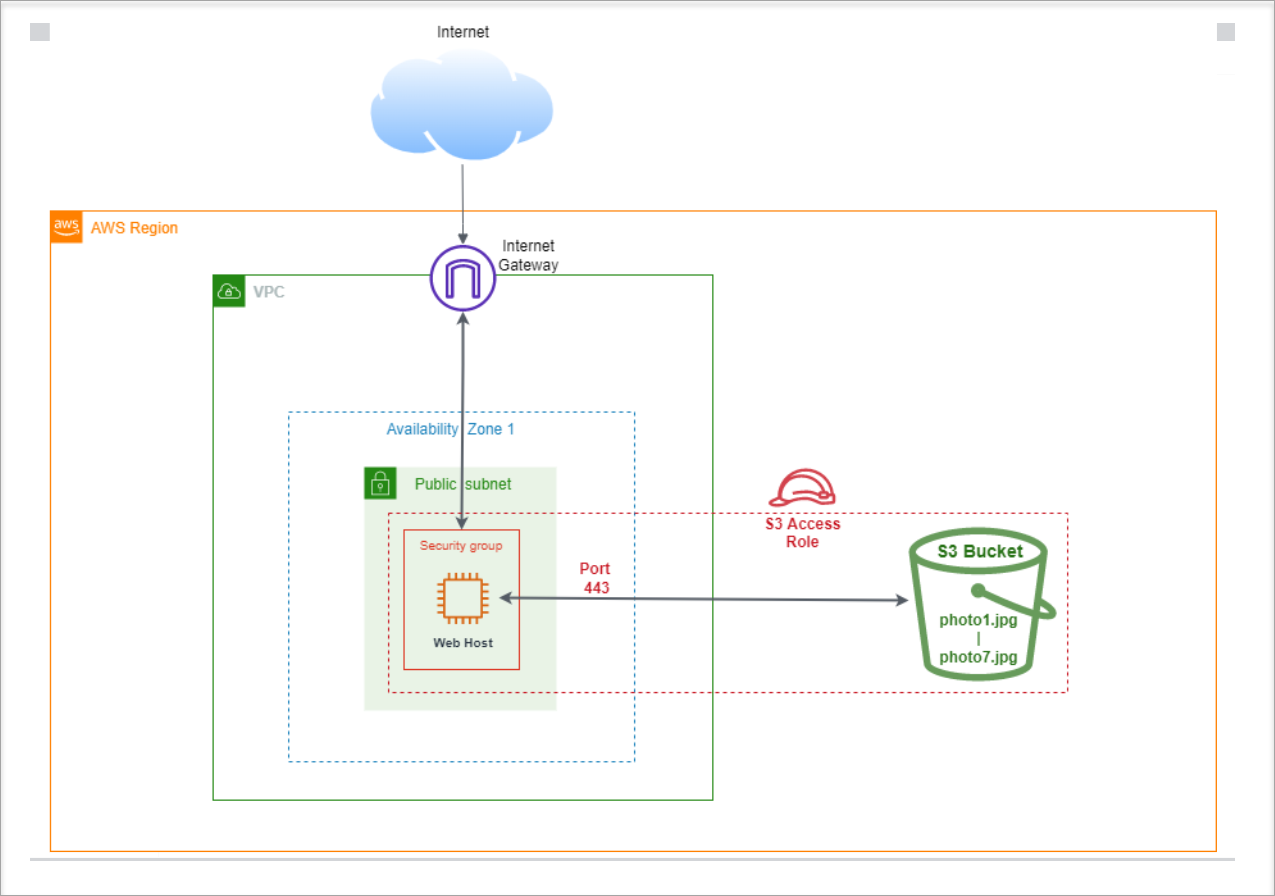
Here is the final architecture of what we have built: