Amazon S3 Hands-On Lab
Amazon S3 Overview
Amazon Simple Storage Service (Amazon S3) is an object storage service that offers industry-leading scalability, data availability, security, and performance. It can be used to store and retrieve any amount of data, at any time, from anywhere on the web.
This lab is designed to demonstrate how to interact with S3 through the AWS Console and how-to setup access to objects within a private S3 bucket to be viewed through an EC2 web host.
This lab will walk you through the following:
- Creating a bucket in S3
- Adding objects to your S3 bucket
- Working with objects in the S3 console
- Accessing objects stored in S3
- Enabling bucket versioning
- Setting up a Lifecycle Policy
- Cleanup: Deleting the objects and the S3 bucket
Lab Text Legend
- “Quoted Text with a gray highlight” - References a heading, title or name in the console.
- Bold Text - Represents a button, link or dropdown that you will need to click on or select.
- Inline code - Text you need to copy for input (Longer text will have a copy button, shorter text will just be highlighted).
- Inline code [with brackets] - The text in brackets represents text that requires a unique input. The required input will be called out in the brackets.
Prerequisites:
If you want to view the images you upload to your S3 bucket and see versioning in action later in the lab, you will need a web host. This web host feature will allow you to interact with your S3 bucket in a real-world environment. Click on the template link button below to build the web host in EC2 using CloudFormation
Download and launch the CloudFormation template
1.Download the “S3-General-ID-Lab.yaml” CloudFormation template by right-clicking on this link and save it to your local hard drive.
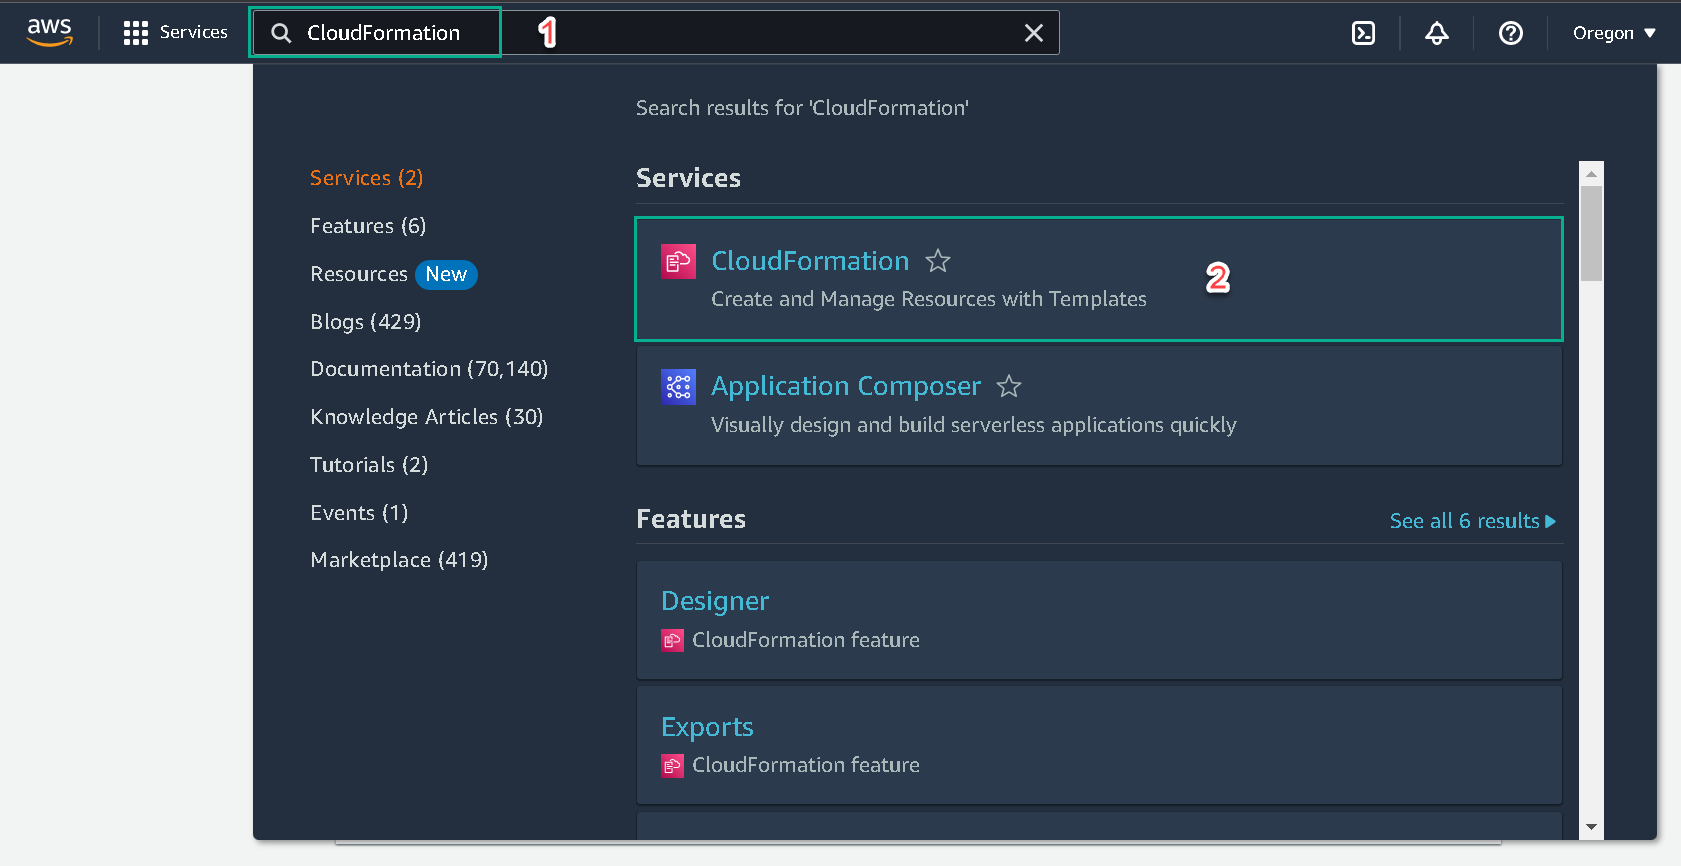
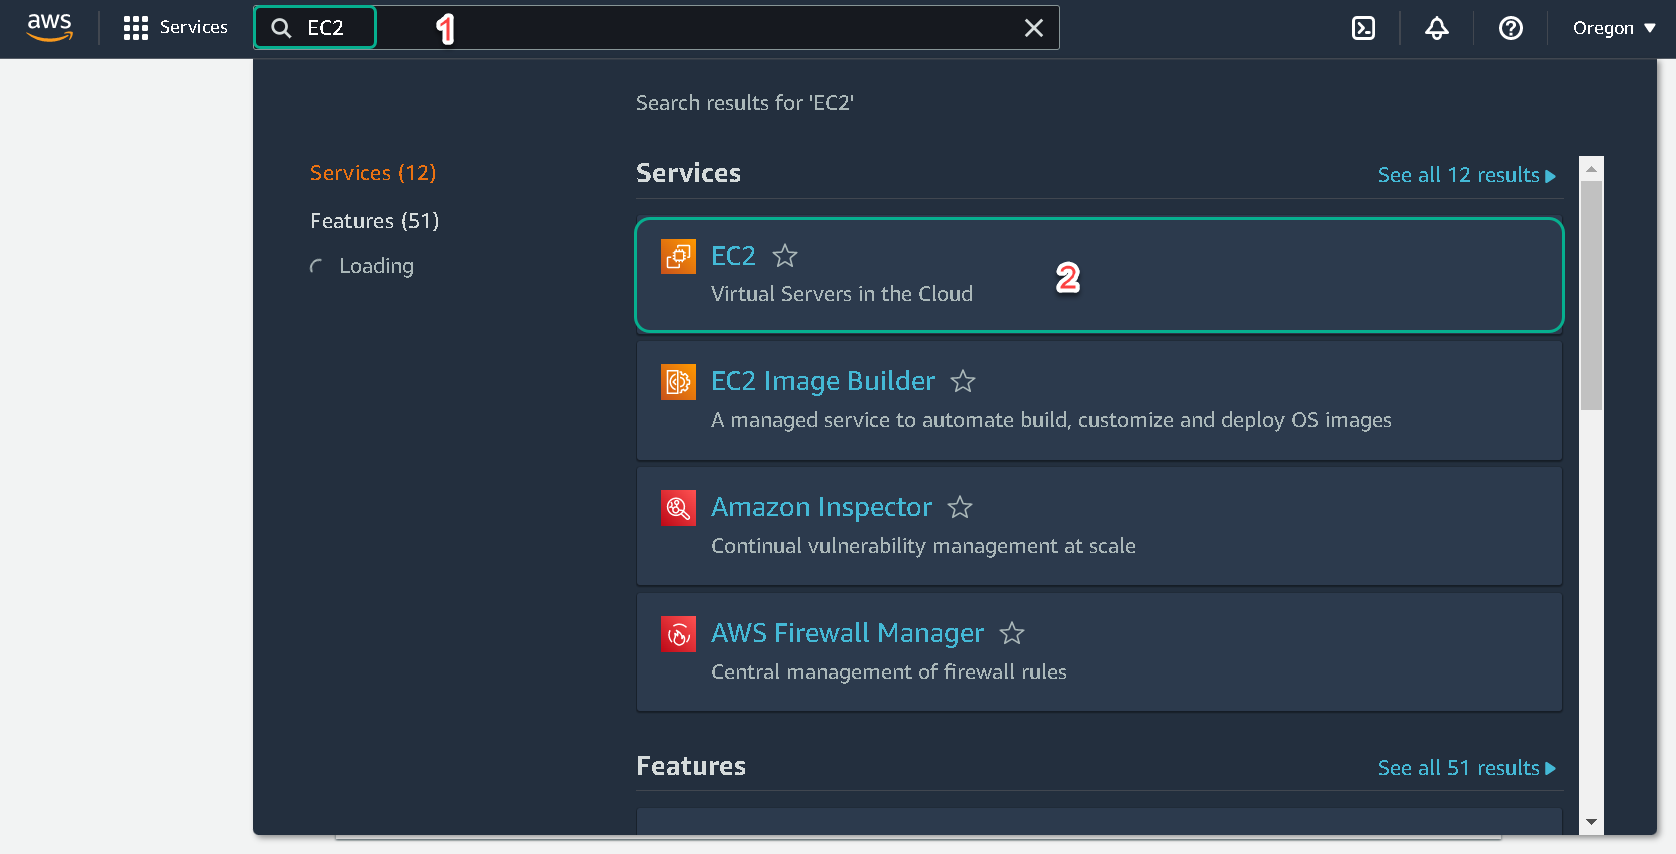
2.In the AWS Console search for CloudFormation or select the Services menu and click on CloudFormation under “Management & Governance”.
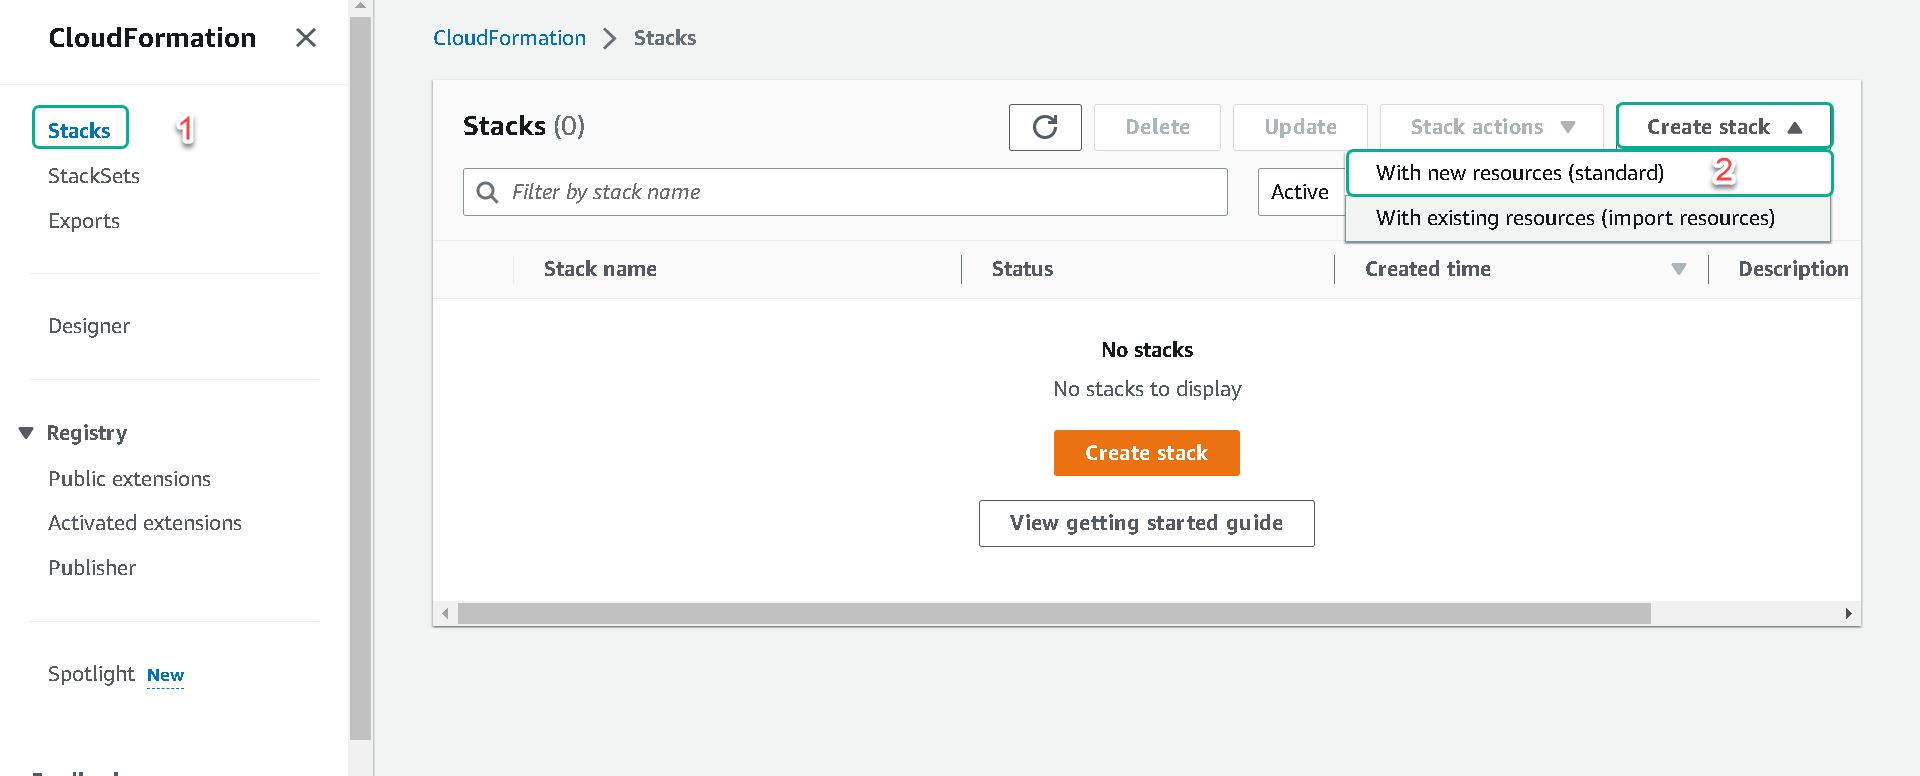
3.In the CloudFormation console select the Create stack button and then select With new resources (standard).
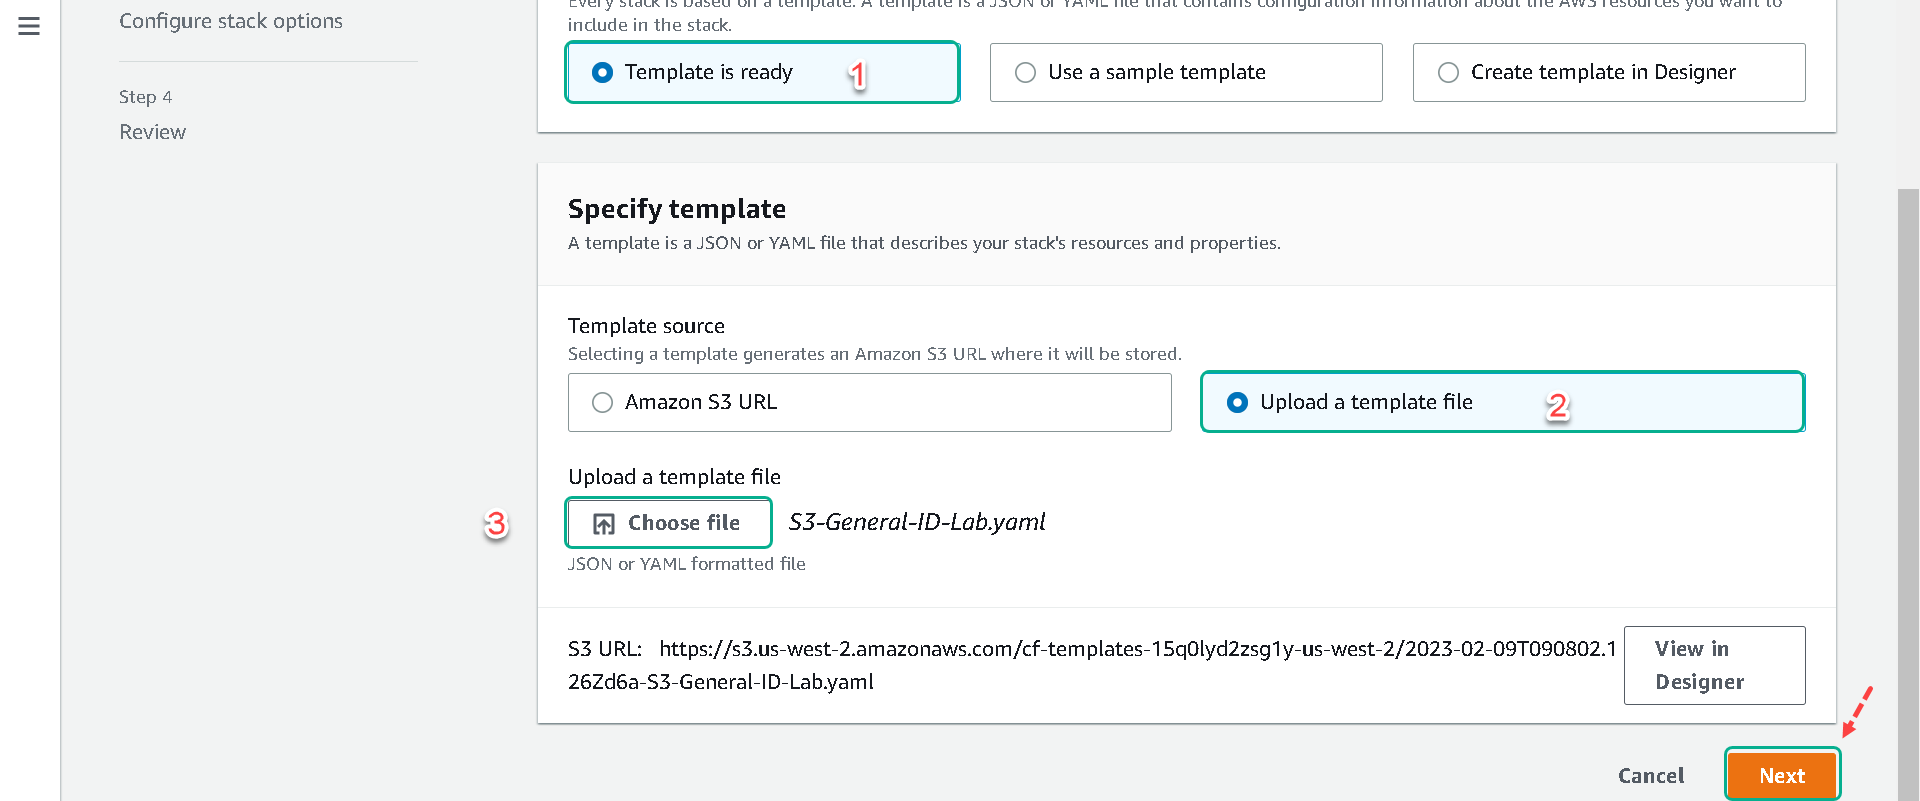
4.Under Template source select Upload a template file and then select the Choose file button. Select the “S3-General-ID-Lab.yaml” template file you downloaded in the first step. Once you have selected the template file click on the Next button.
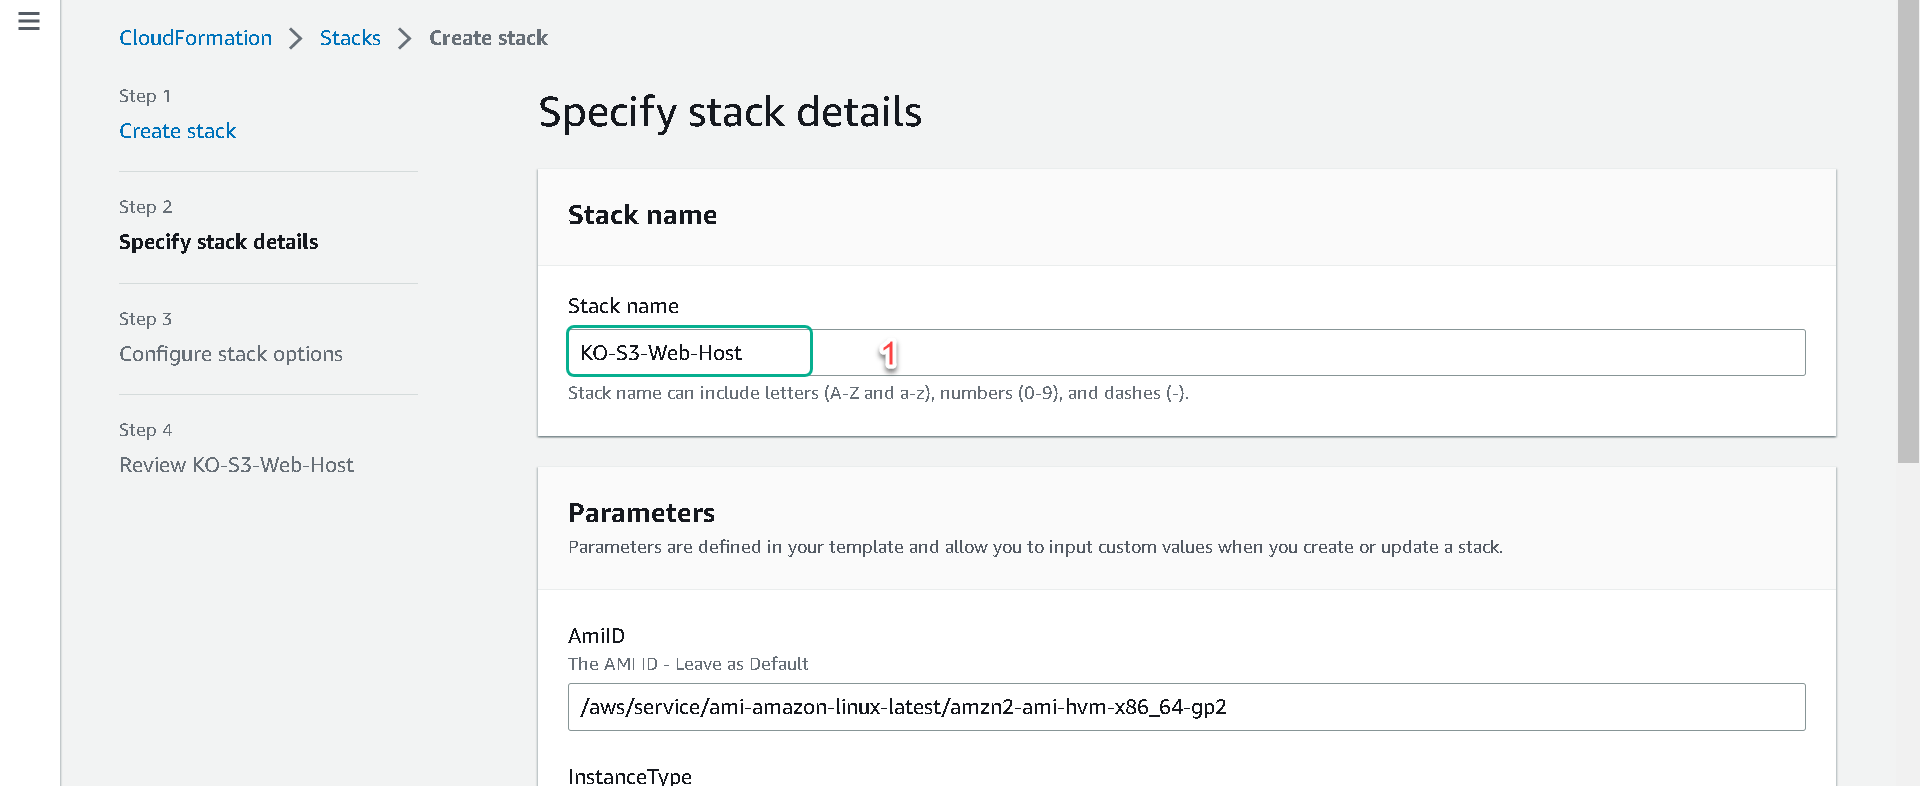
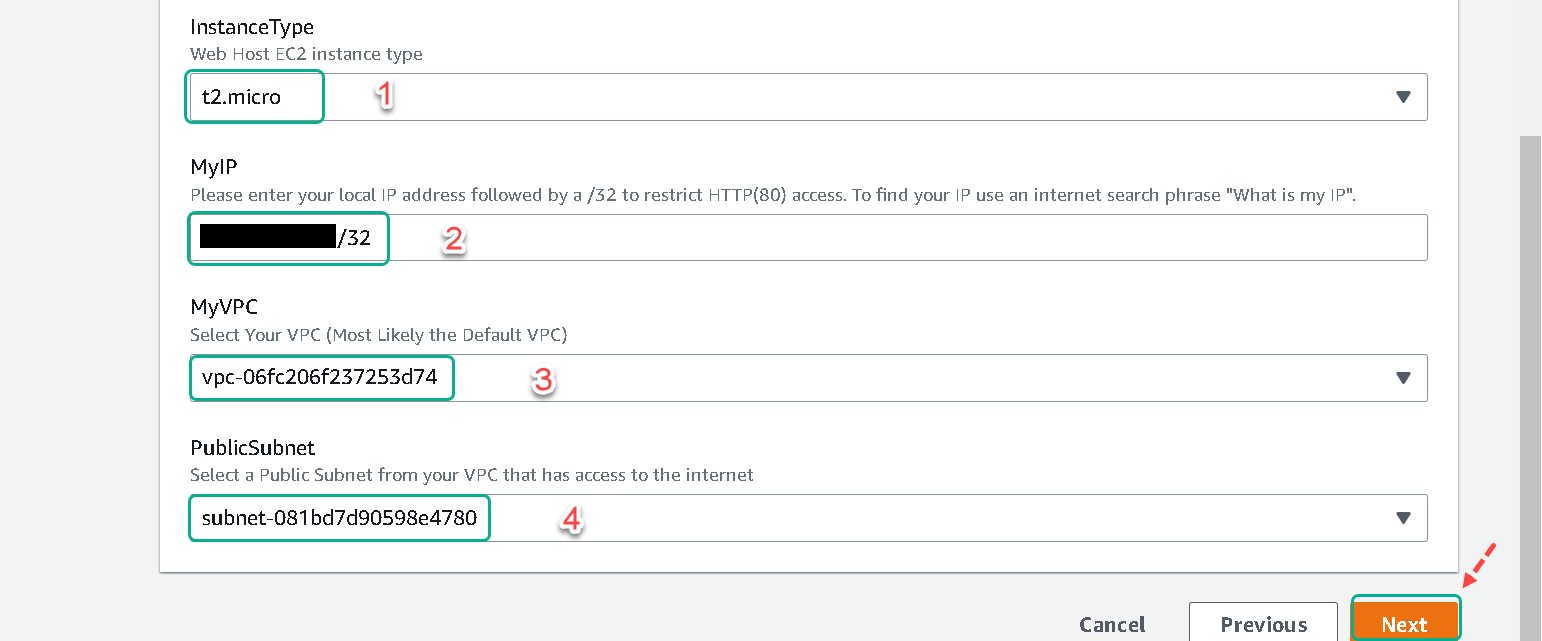
5.On the Specify stack details page, fill in the following fields:
a. Under “Stack name” name your stack [Your Initials]-S3-Web-Host.
b. You can leave “AmiID” as the default, resulting in the use the most recent version of this AMI.
c. Under “InstanceType” select the t2.micro (free tier) or you can choose the m5.large if you have an issue with the t2.micro for any reason.
d. Under “MyIP” input the IP address of your local machine followed by a /32. This will lock down HTTP port 80 to your machine. You can find your local IP by searching What is my IP.
e. Under “MyVPC” select the VPC you want to use to setup the instance. In most accounts the default VPC will be a good choice and in new AWS accounts it will be the only choice.
f. Under “PublicSubnet” select a subnet within your VPC that has internet access. A public subnet is defined by a subnet having a route to the internet gateway within its route table. By default, the default VPC subnets are all public.
6.Once you are done entering the details above, click on Next. On the next page, “Configure stack options”, you can leave “Tags”, “Permissions”, and “Advanced options” as default and select Next.
7.Wait till the “Logical ID” “[Your Initials]-S3-Web-Host” shows a status of “CREATE_COMPLETE”. You will need to click on the refresh button to get the updated status of your stack.
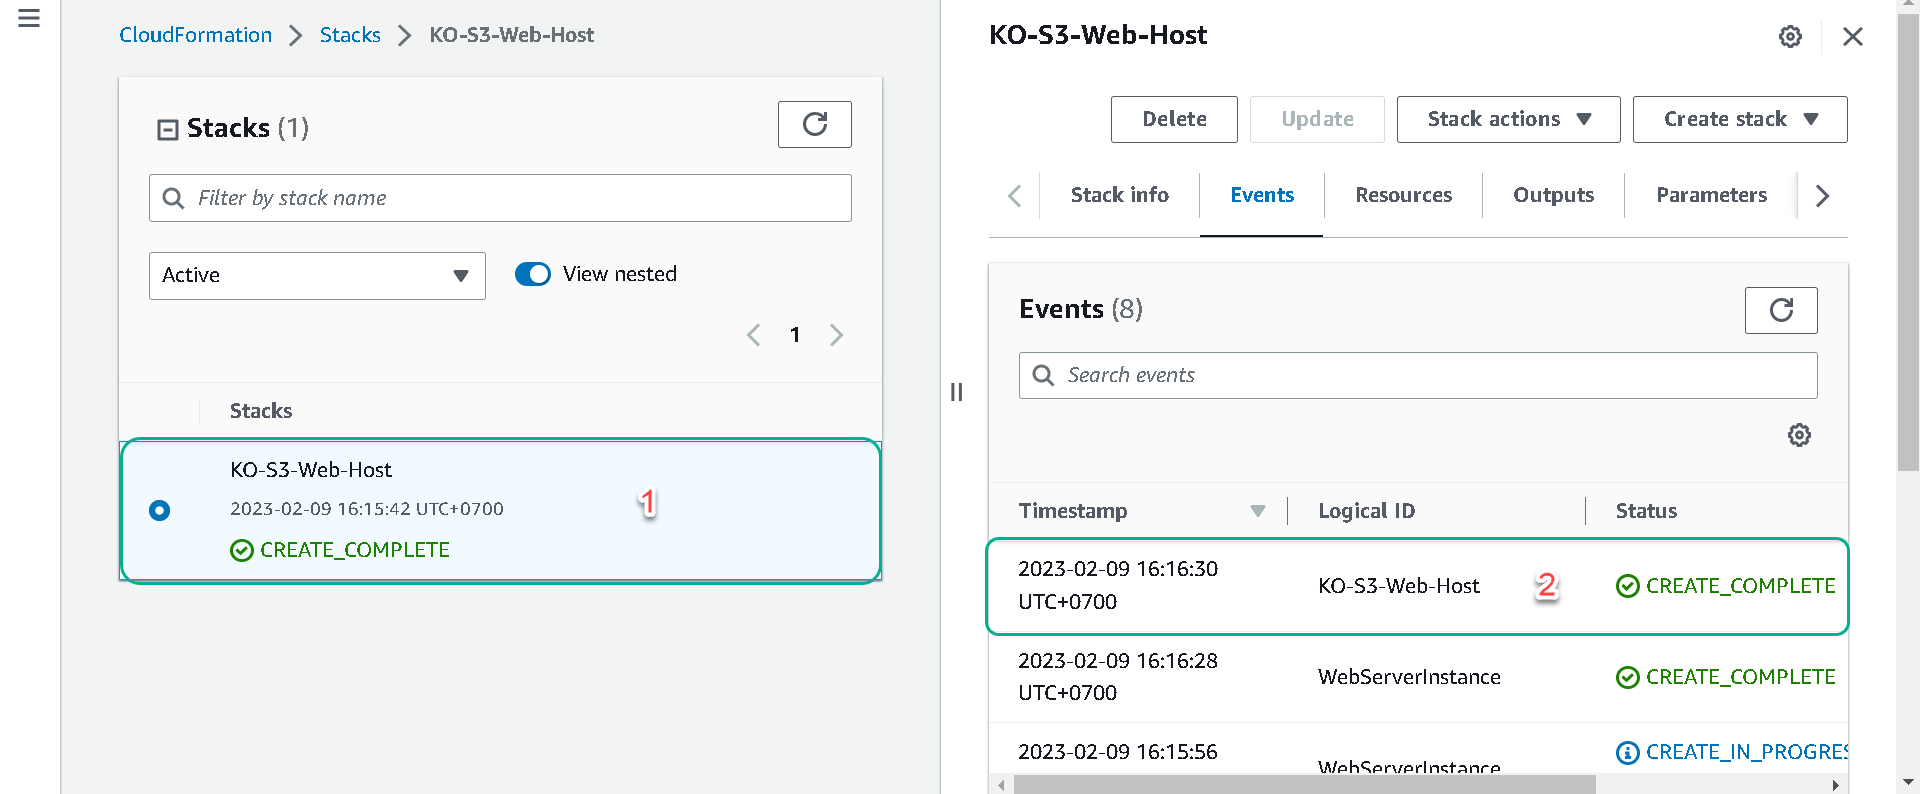
The CloudFormation stack creation should be completed in about 3 minutes.
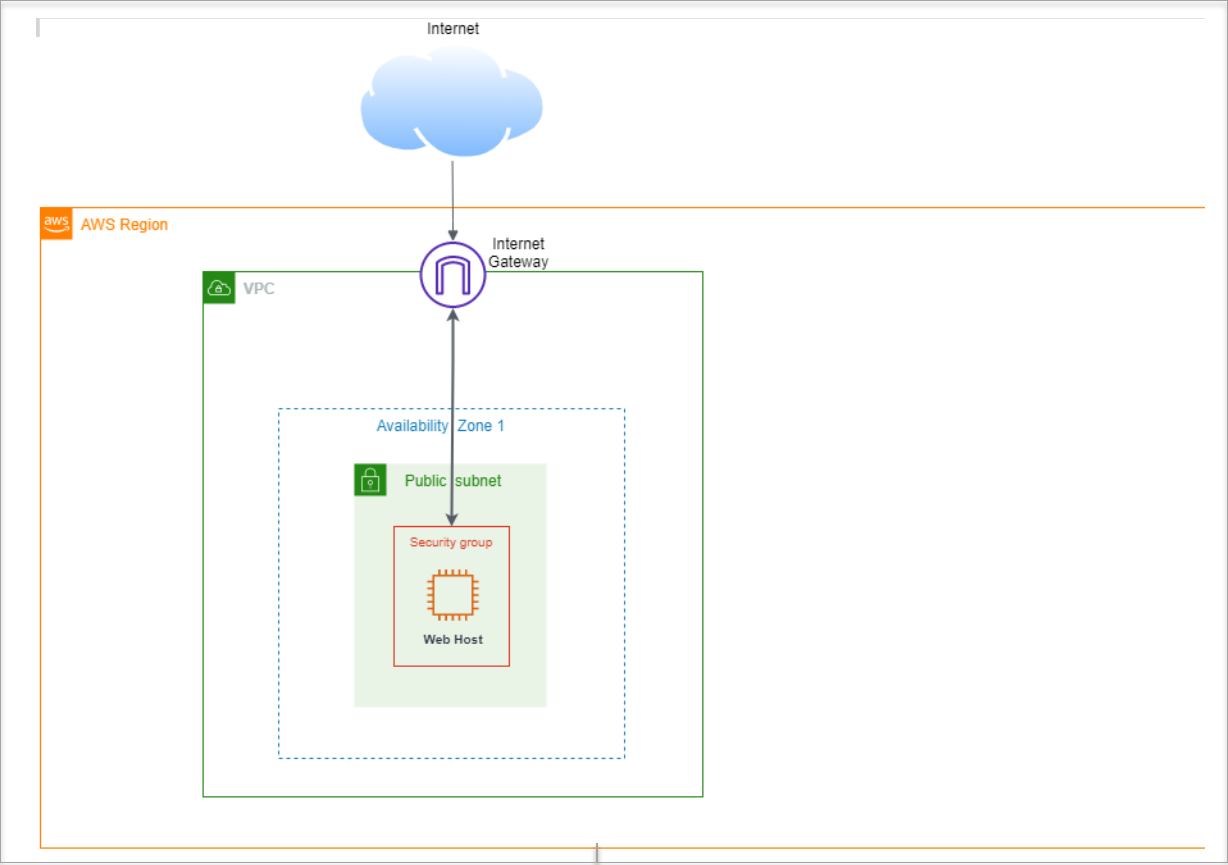
The CloudFormation script has now created the architecture below:
Confirm the successful setup of your instance
You should now see the “S3 Hands-On Lab” page which we will use later in the lab.
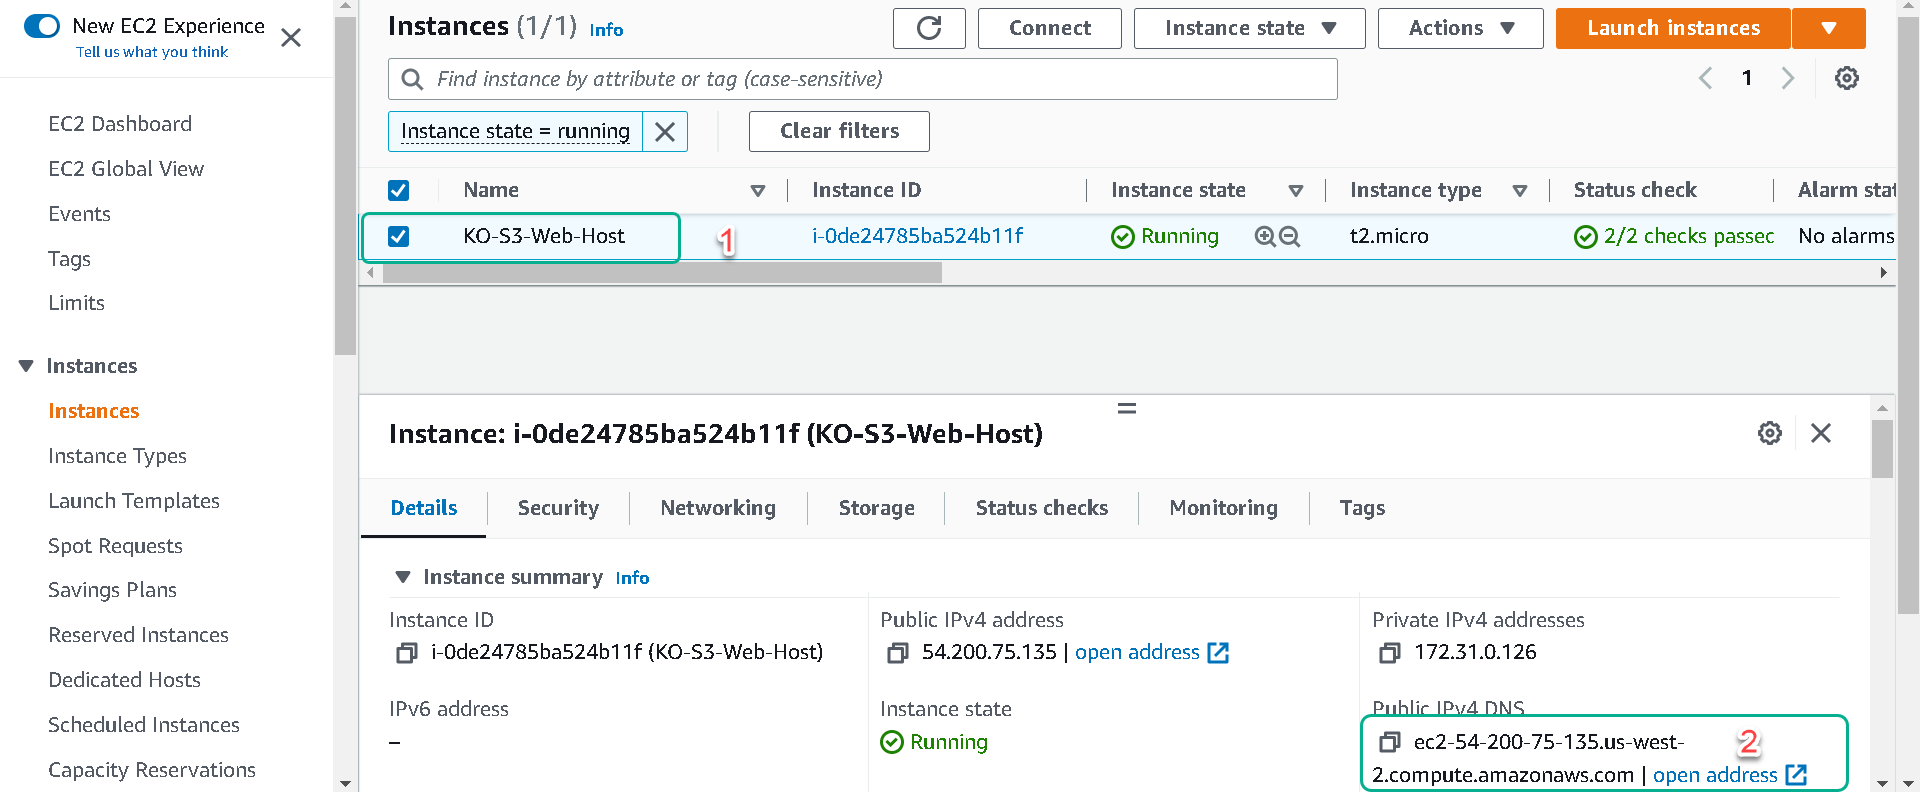
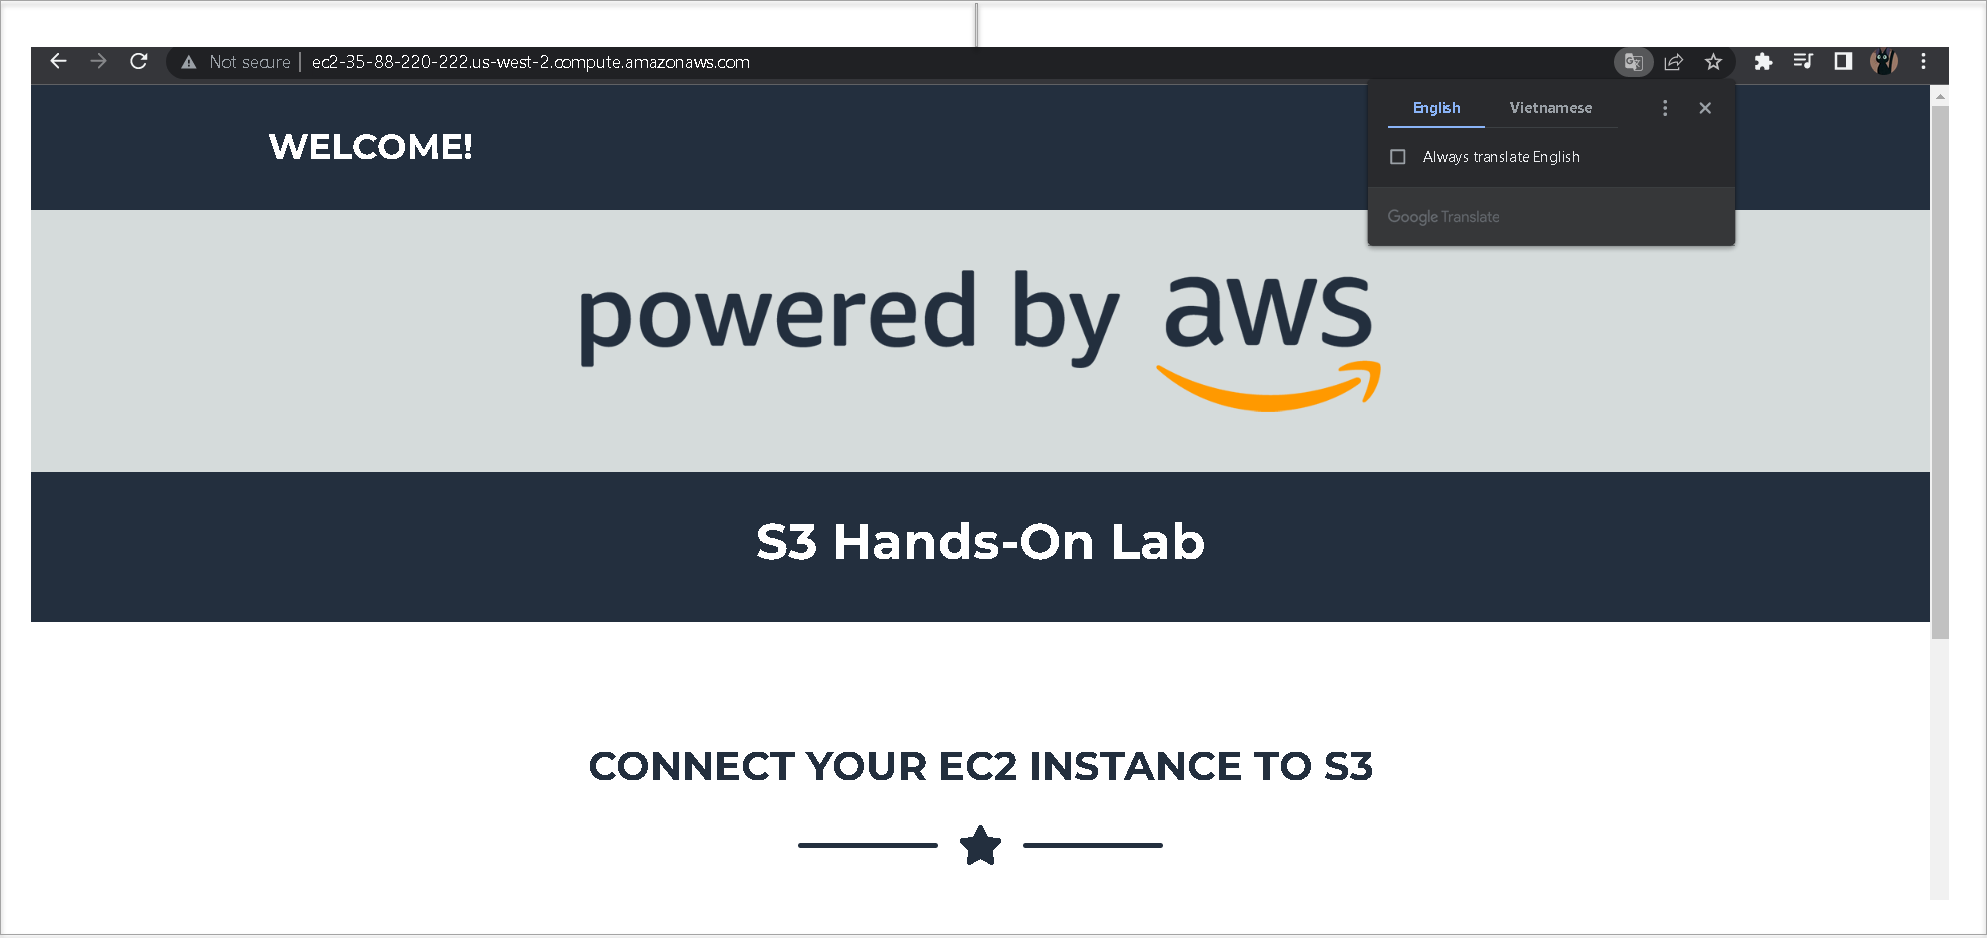
If the page does not load it is recommended you wait for your instance “Status check” to show “2/2 checks passed” and then try again.