Configure a CloudWatch Alarm
Configure a CloudWatch Alarm
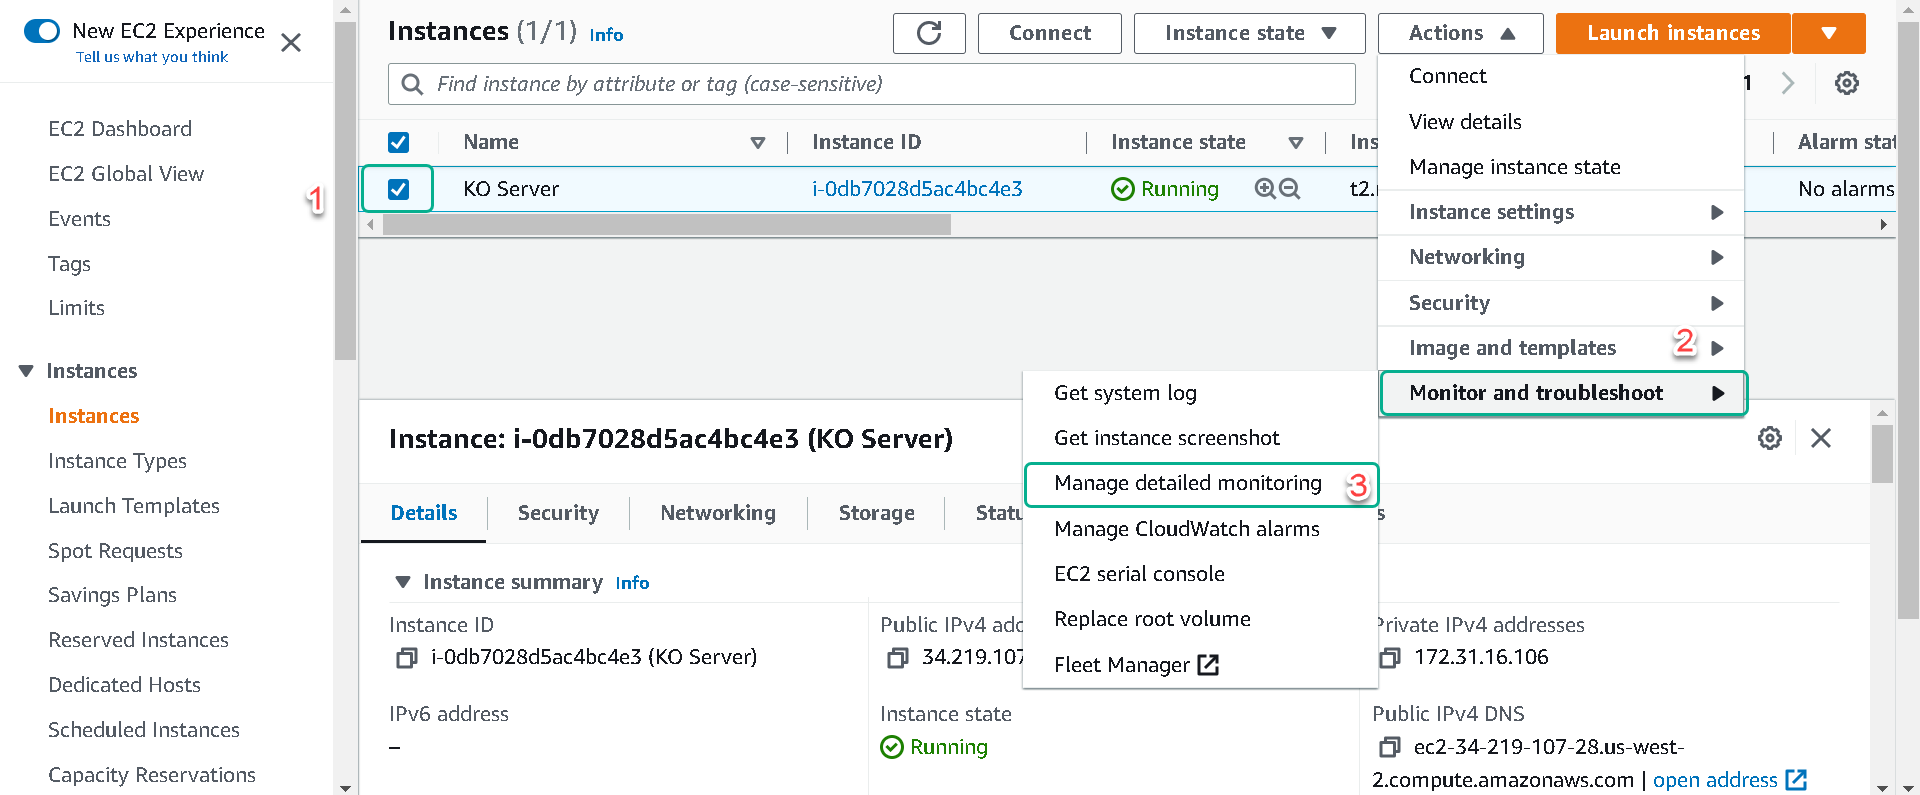
1.In the EC2 Console, click the checkbox next to your server name to view details about this EC2 instance. Click Actions » Monitor and troubleshoot » Manage detailed monitoring.
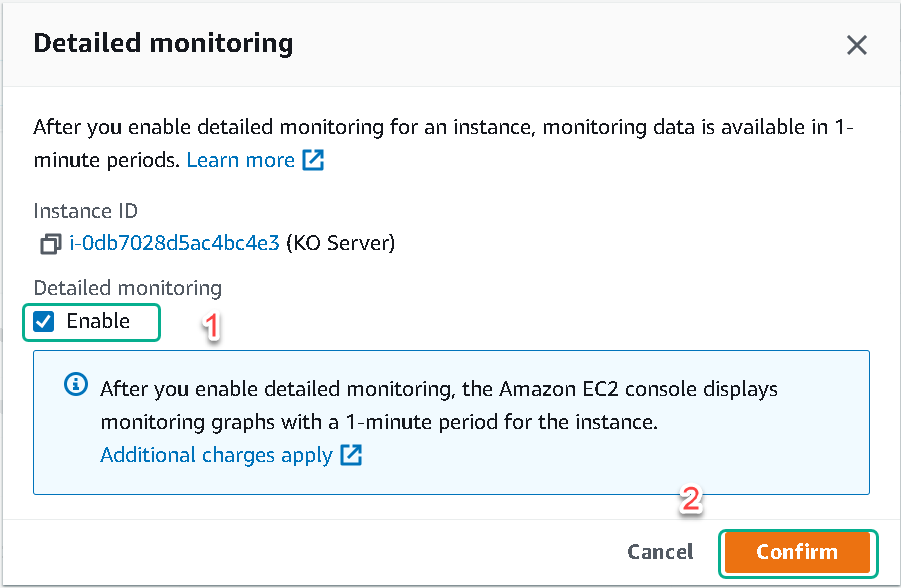
And then check Enable button under Detailed monitoring to provide monitoring data at a 1 minute interval vs. the default of 5 minutes. Click Save
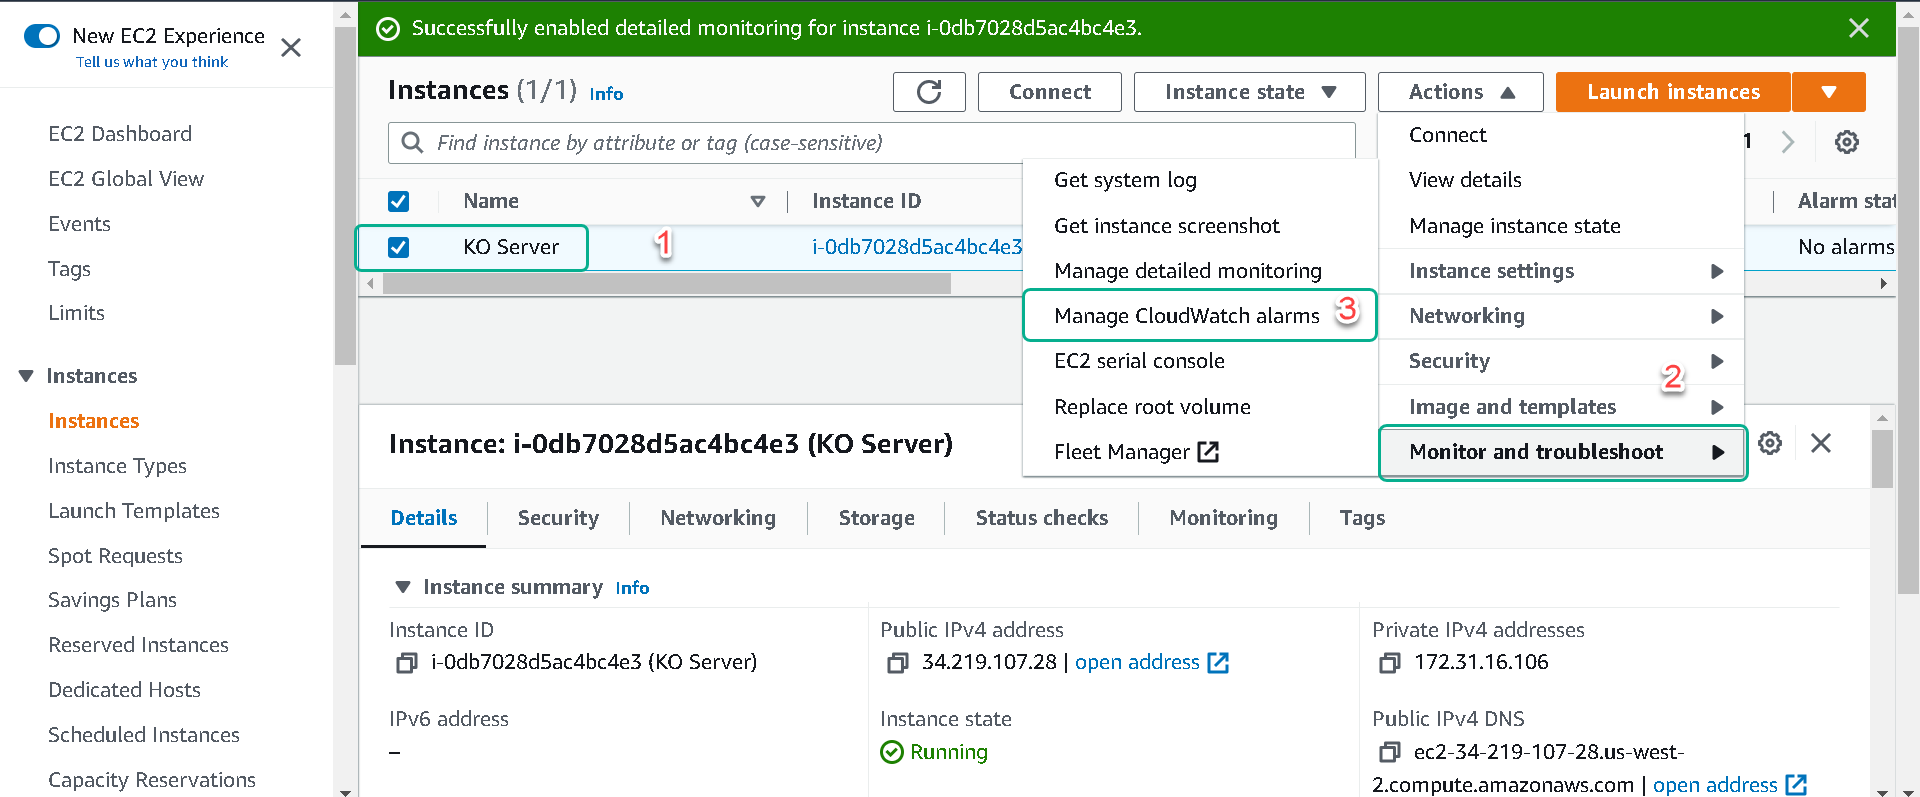
2.Click on Actions » Monitor and troubleshoot » Manage CloudWatch alarms.
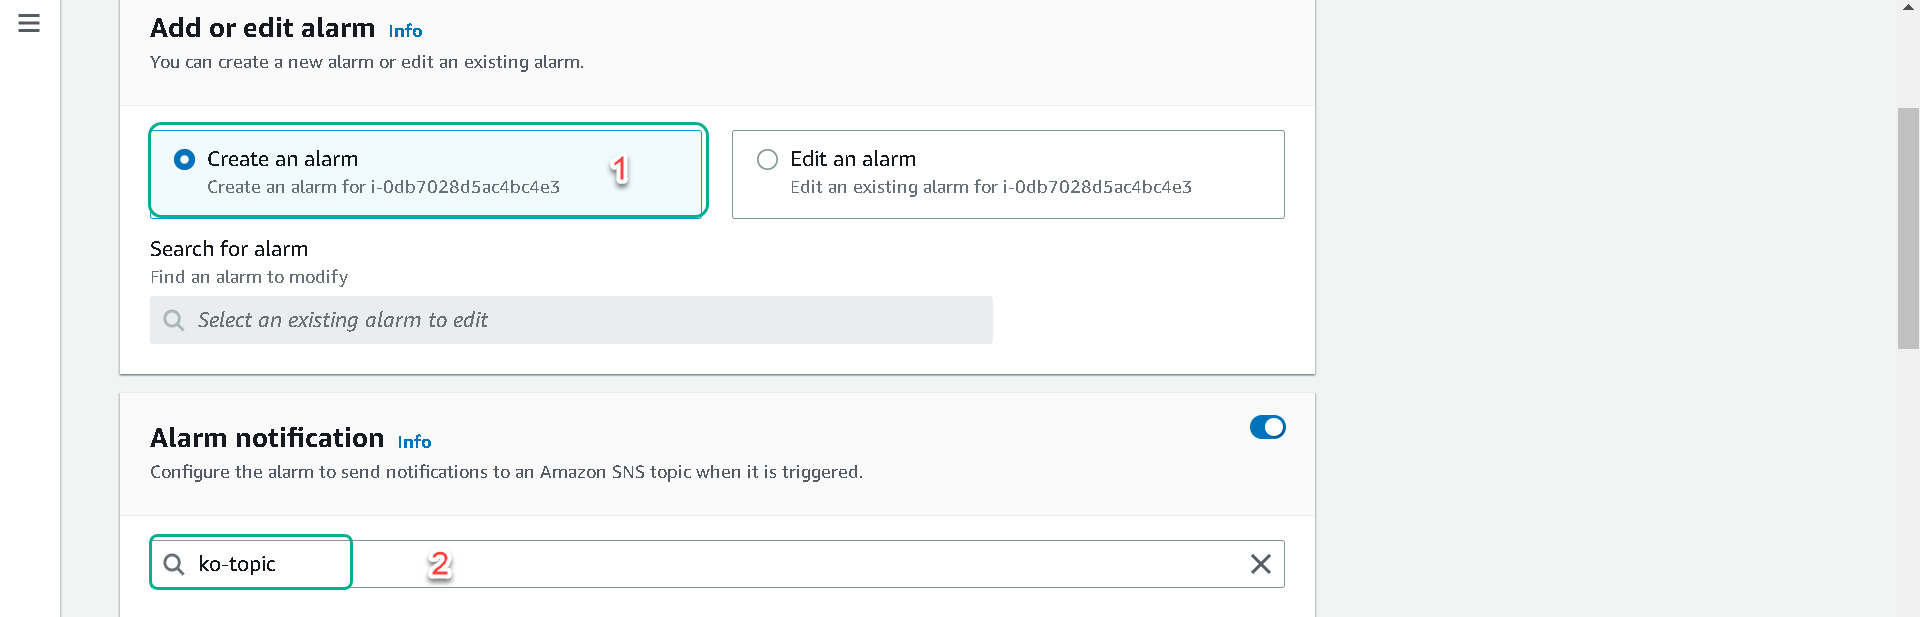
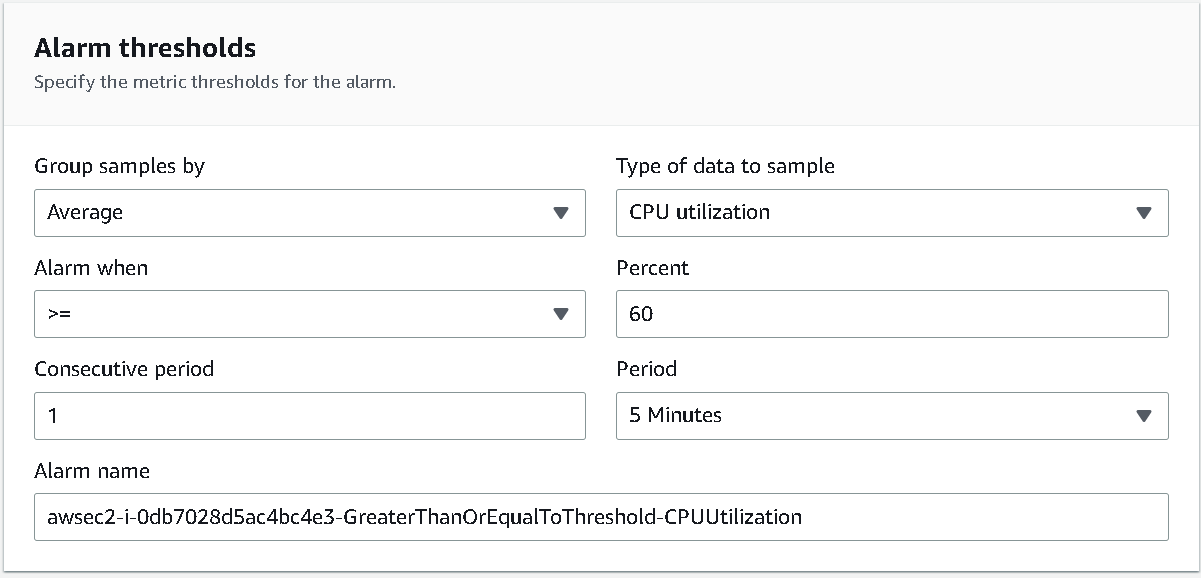
3.Select Create an alarm. Under Alarm notification, select the SNS topic created in Part 1. In the Alarm thresholds section, set the values as shown below and then click Create.
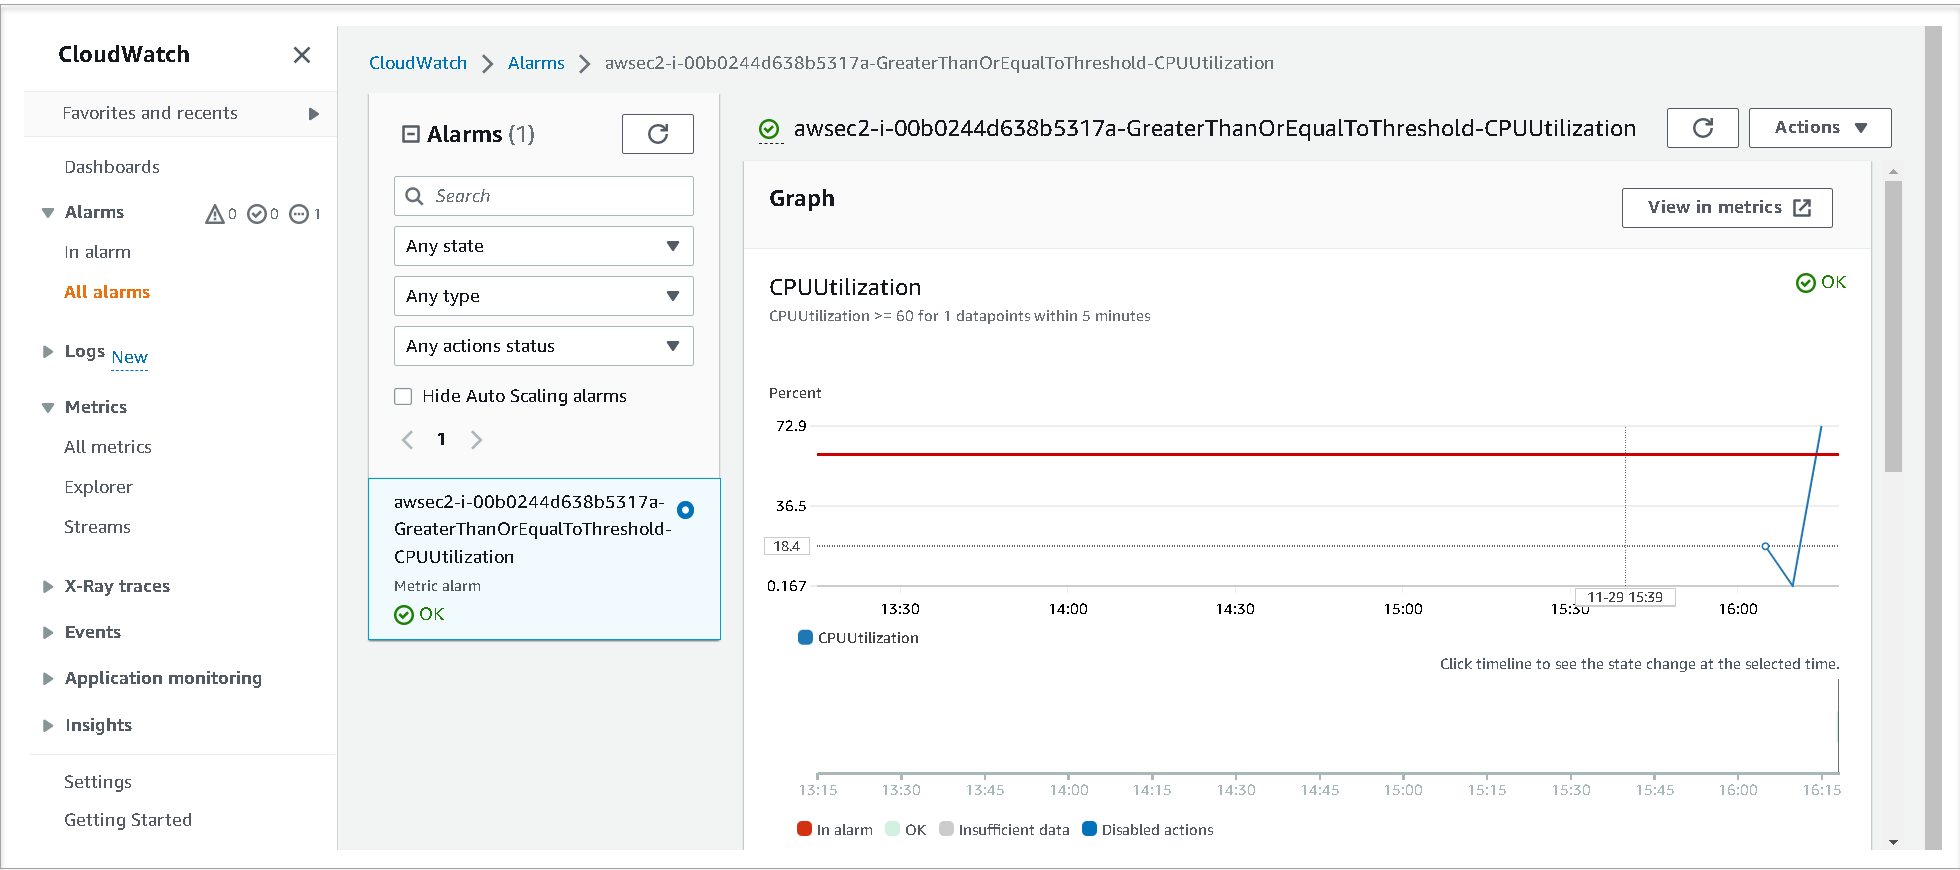
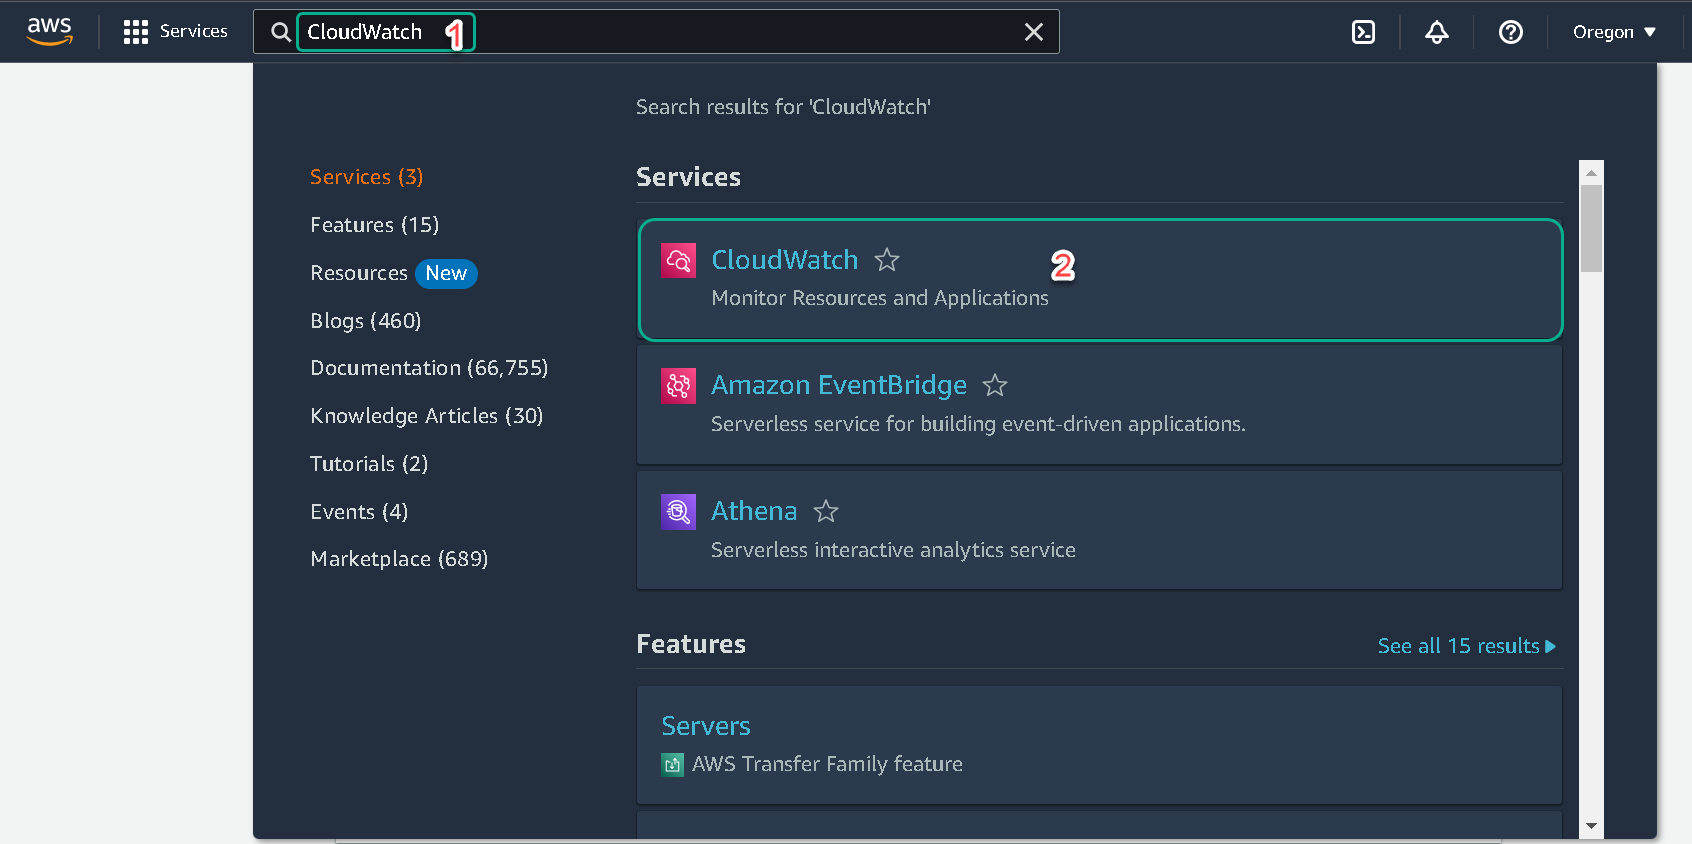
4.In the top left area of the AWS Console, select Services click CloudWatch. Click Alarms in the left pane of the Console and select All alarms. Check the State of your alarm. It most likely says INSUFFICIENT_DATA(because you just created it) and later it will say OK. You can also use instance-id to filter the alarms for your EC2 instance.
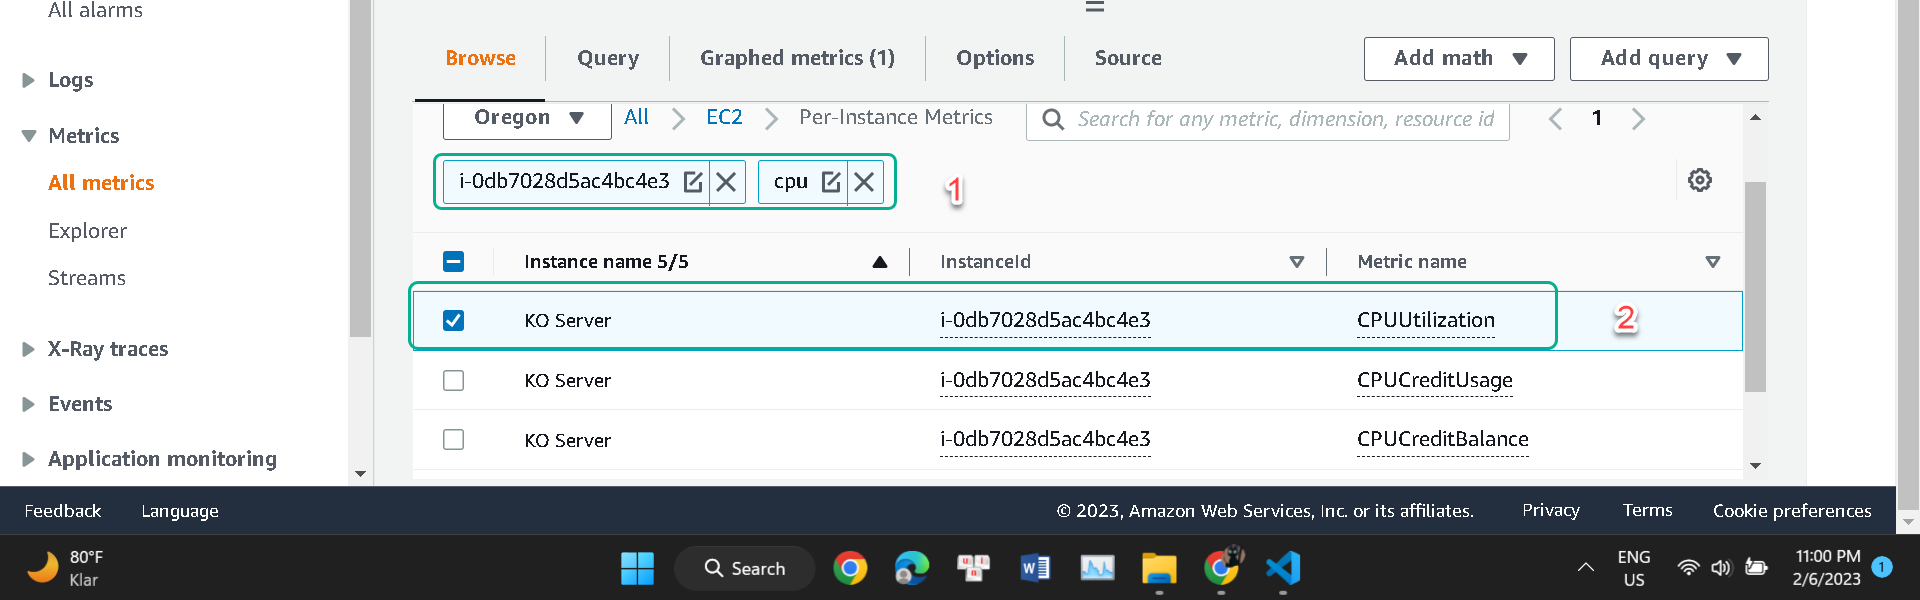
5.In the CloudWatch Console, select Metrics in the left pane. Select the All Metrics tab and paste your Instance ID into the filter.
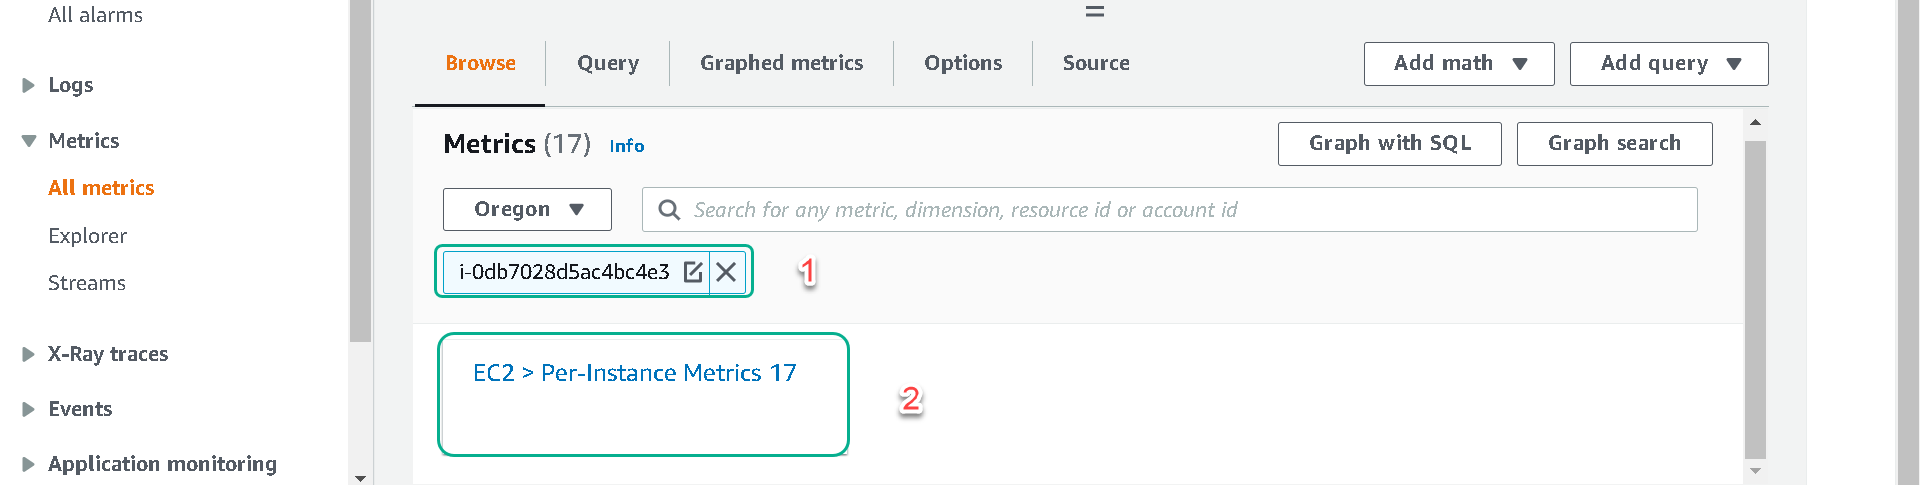
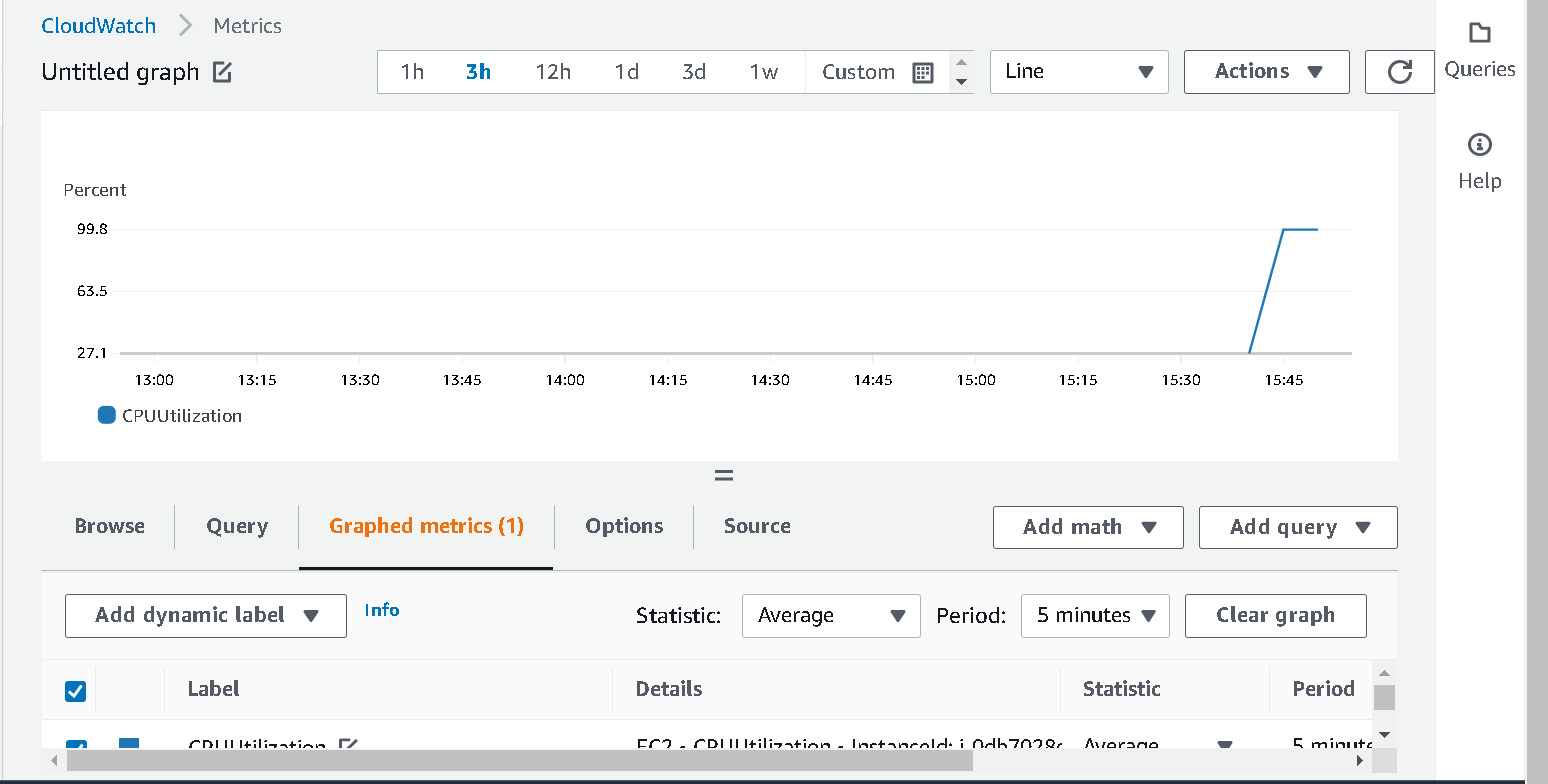
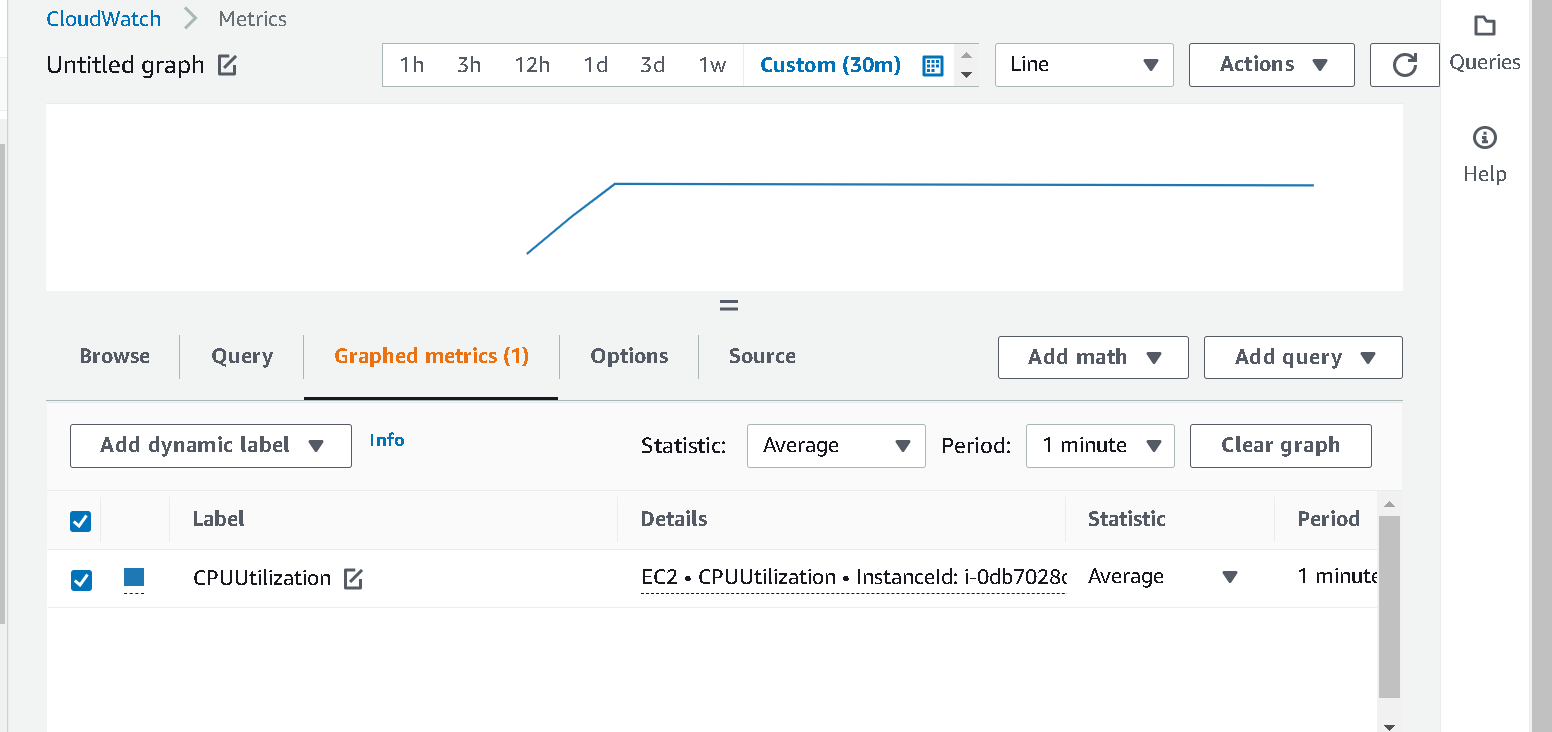
6.Click on Per-Instance Metrics and then add an additional filter CPU. Select CPUUtilization metric. Click on Graphed metrics button and change the Period to 1 Minute. Change the graph interval to a custom value of 30m and select Auto refresh of 1 min.
7.After 5 minutes, the stress tool will begin to simulate CPU workload and trigger the Alarm once the threshold is reached. You can view the Alarm state in the CloudWatch console under Alarms. Select All alarms and you should be able to see the configured alarm. If you setup an email notification, you will receive an email alert when the Alarm is triggered.

Congratulations! You have successfully configured a CloudWatch Alarm!